Integrations
Throughout the previous articles, the data received by the devices are either displayed in their raw form in Live View panels or displayed in Dashboards.
What about the case where the data need to be sent/captured by 3rd party applications?
insigh.io platform offers 3 different ways of accessing the device data as an external application / user.
- Directly subscribe on the device Data Channel with MQTT. Regardless of the protocol that the devices use to upload data, if a user or application subscribes to the topic
channels/<data-channel-id>/messages/#orchannels/<data-channel-id>/messages/<device-id>will receive all the raw measurements as soon as they are received by the insigh.io platform.- the MQTT subscription, requires username/password. The data channels of each user can only be accessed using the Device ID/Key of any device.
- Use HTTP API: As described in article HTTP API description device data can be queried and retrieved on demand.
- Integrations: Use the built-in Integrations service of the insigh.io Console. The service listens to all device messages, and based on filters, it is responsible of redirecting the message to 3rd party systems over MQTT, HTTP, socket.io or FTP in real time. It also supports the option to modify the message format using Decoders to match 3rd party system requirements.
MQTT redirection
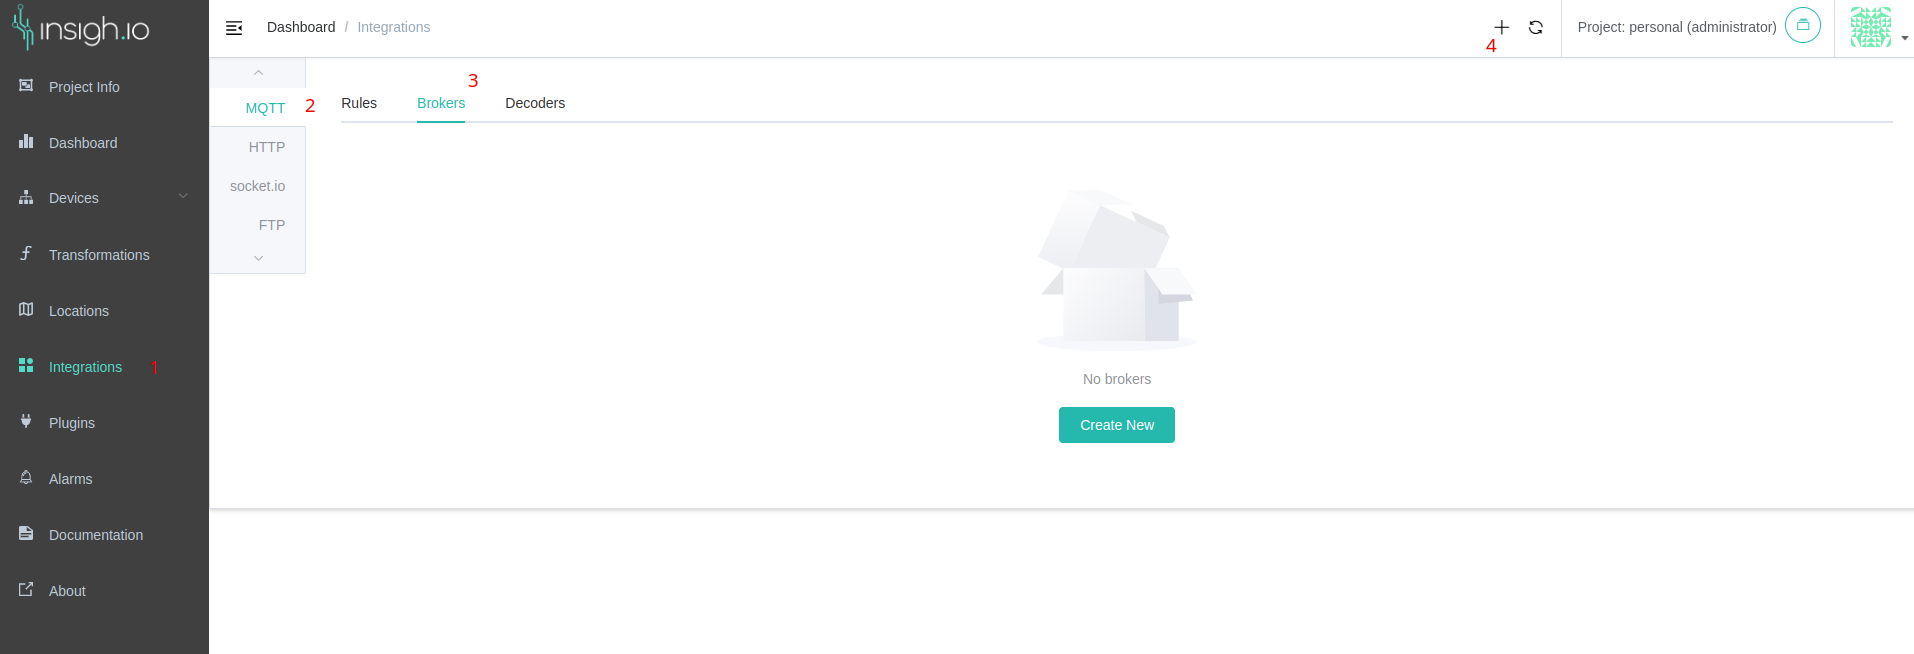
An MQTT integration rule creates a service that publishes every message received at a selected topic to a 3rd party MQTT broker. The first step of each MQTT integration is to setup the connection details of the remote MQTT broker. To configure a MQTT broker connection, select Integrations -> MQTT -> Brokers and then click on the Add new button:
The connection details include:
- MQTT broker URL
- MQTT broker Port
- Username (optional)
- Password (optional)
- Use TLS (optional): enables MQTT with TLS termination for secure (encrypted) communication between the insigh.io Console and the external MQTT broker
- CA Certificate (optional): Provide the CA Certificate chain if TLS is enabled
- Client Certificate (optional): Provide the client certificate, required if mutual TLS is configured
- Client Private Key (optional): Provide the client private key, required if mutual TLS is configured

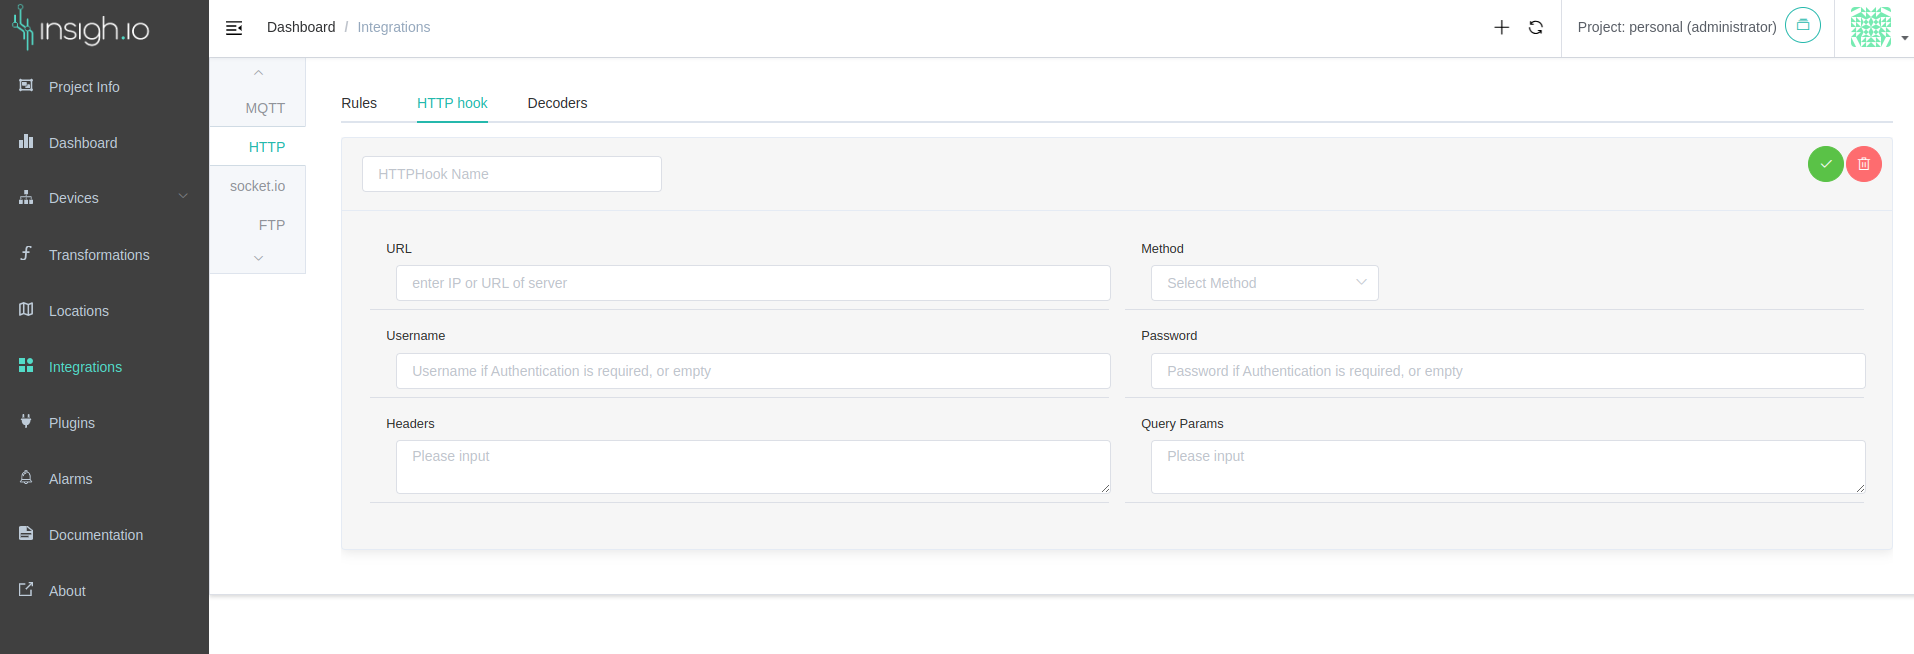
HTTP redirection
An HTTP integration rule creates a service (HTTP hook) that calls the provided HTTP API in real time upon receiving a new message. For instance, this could be an HTTP API that a remote system requires to store locally the device data. The connection details include:
- HTTP URL
- HTTP method (POST, PUT)
- Username (optional): if HTTP authentication is required
- Password (optional): if HTTP authentication is required
- Headers: JSON with the custom Headers to be used in the request
- Query Params: JSON with the query Parameters that the URL might require
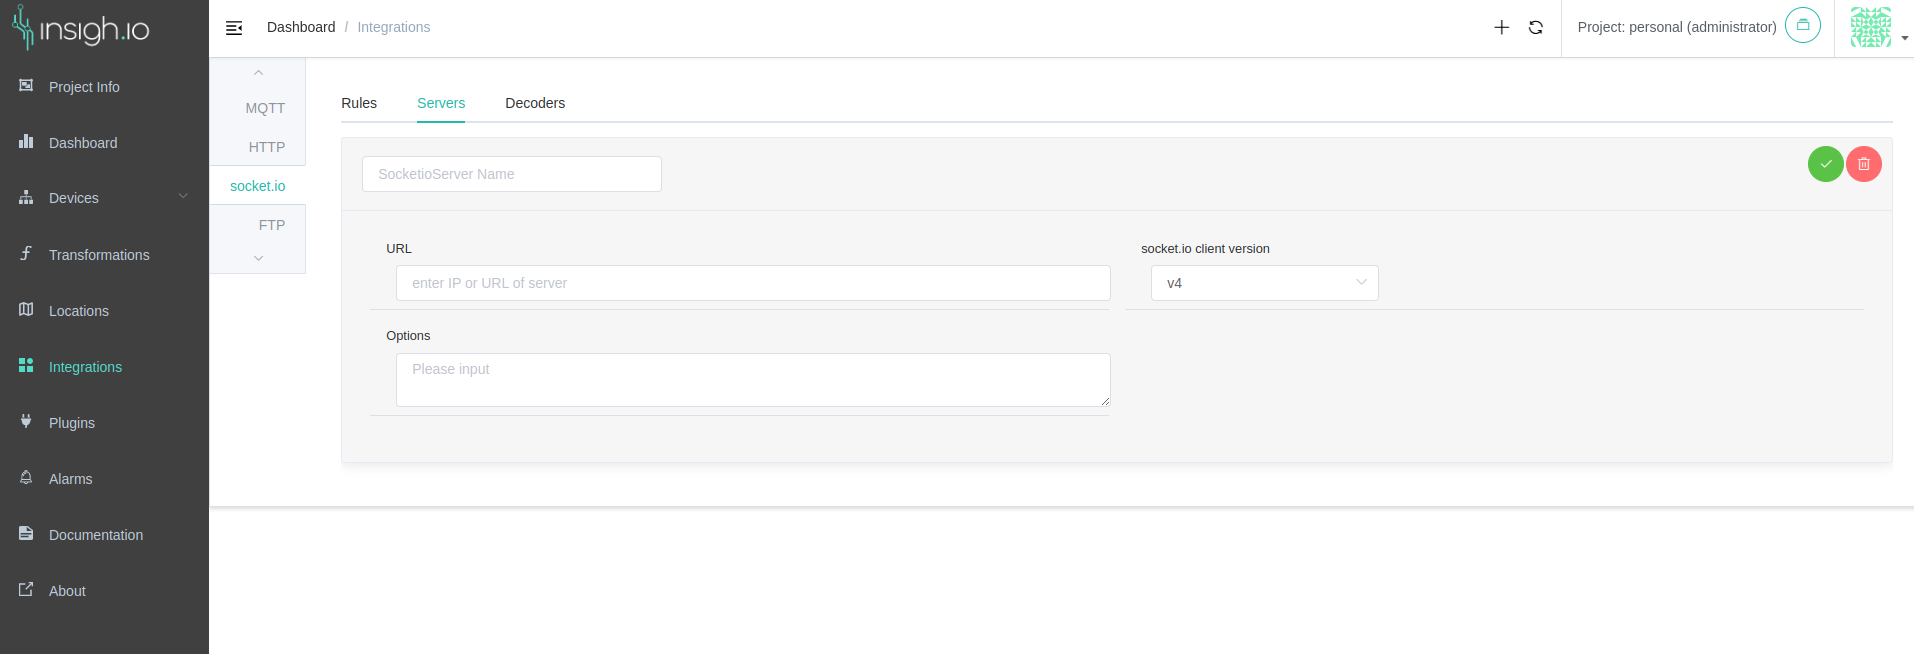
socket.io
A socket.io rule creates a service that connects to the relevant server and pushes incoming messages. The connection details include:
- Server URL
- socket-io client version
- socket-io options
FTP upload
The FTP upload rule creates a service that uploads a set of received messages to a user-defined FTP server as a file. Although this service is also real-time, its main difference to the other integrations services is that it is designed to process multiple messages and upload the resulting information to the destination server. Once a device, for which an FTP integration rule has been defined, sends a message to the Console, the service caches the message and waits for a window of 5 seconds for more messages. Every time a new message arrives within that window, the timer is reset. When the timer expires, the collected messages are all processed together by the associated decoder. Therefore, the service is designed to function better with devices that have been configured with a batch upload.
The FTP decoder defines the filename and the content of the file that will be uploaded to the destination server. Therefore, the users are in full control of the format of the file that will be uploaded.
To define the destination FTP server, the following information is required:
- The protocol (FTP/FTPS/SFTP)
- The server URL
- The port
- The username (optional)
- The password (optional)
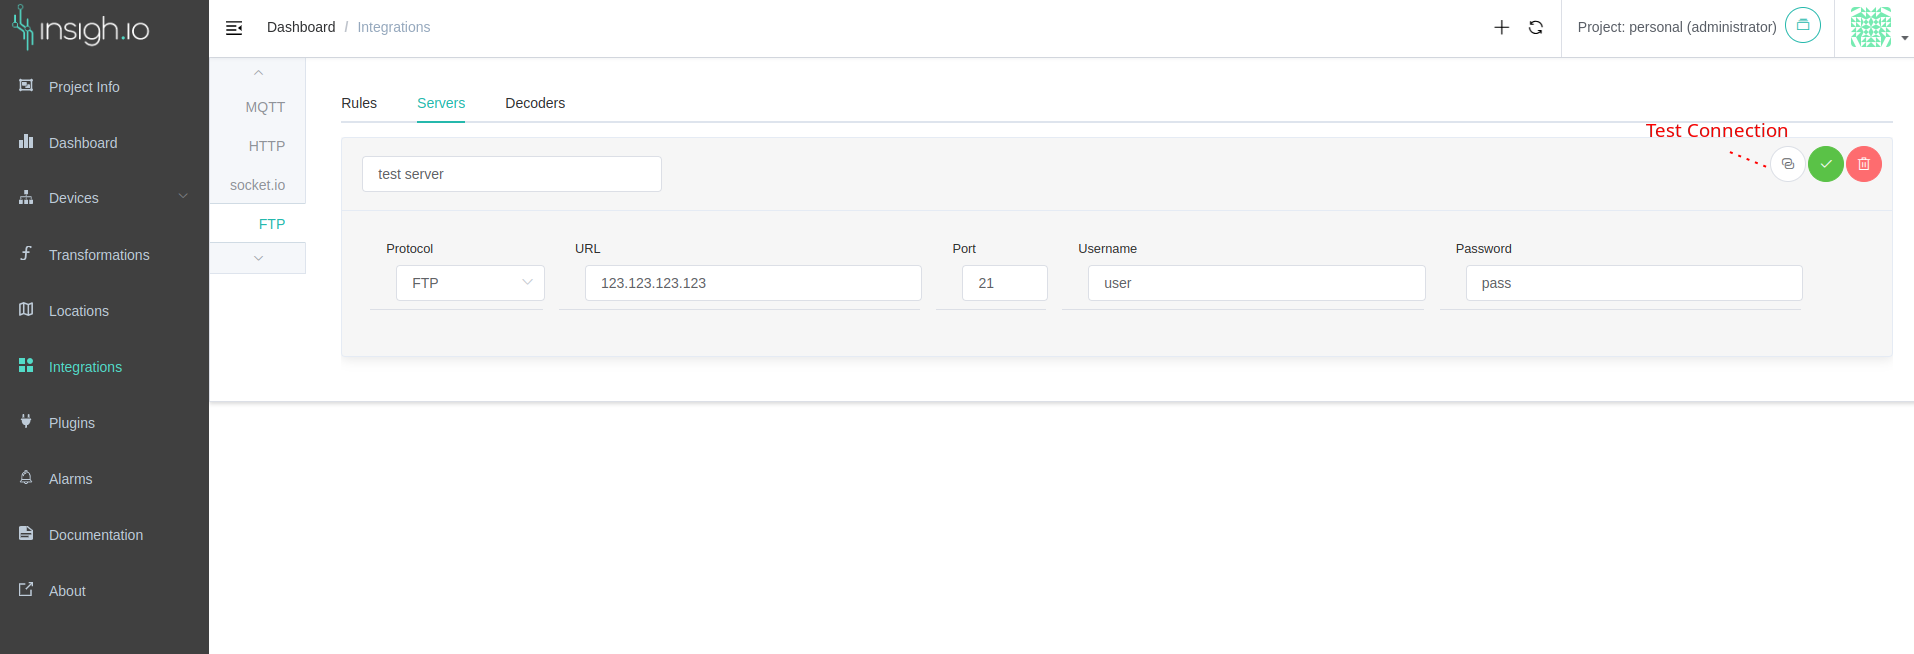
To make sure that the server information is correct, a “Test Connection” button is provided at the server card, as shown in the image above.
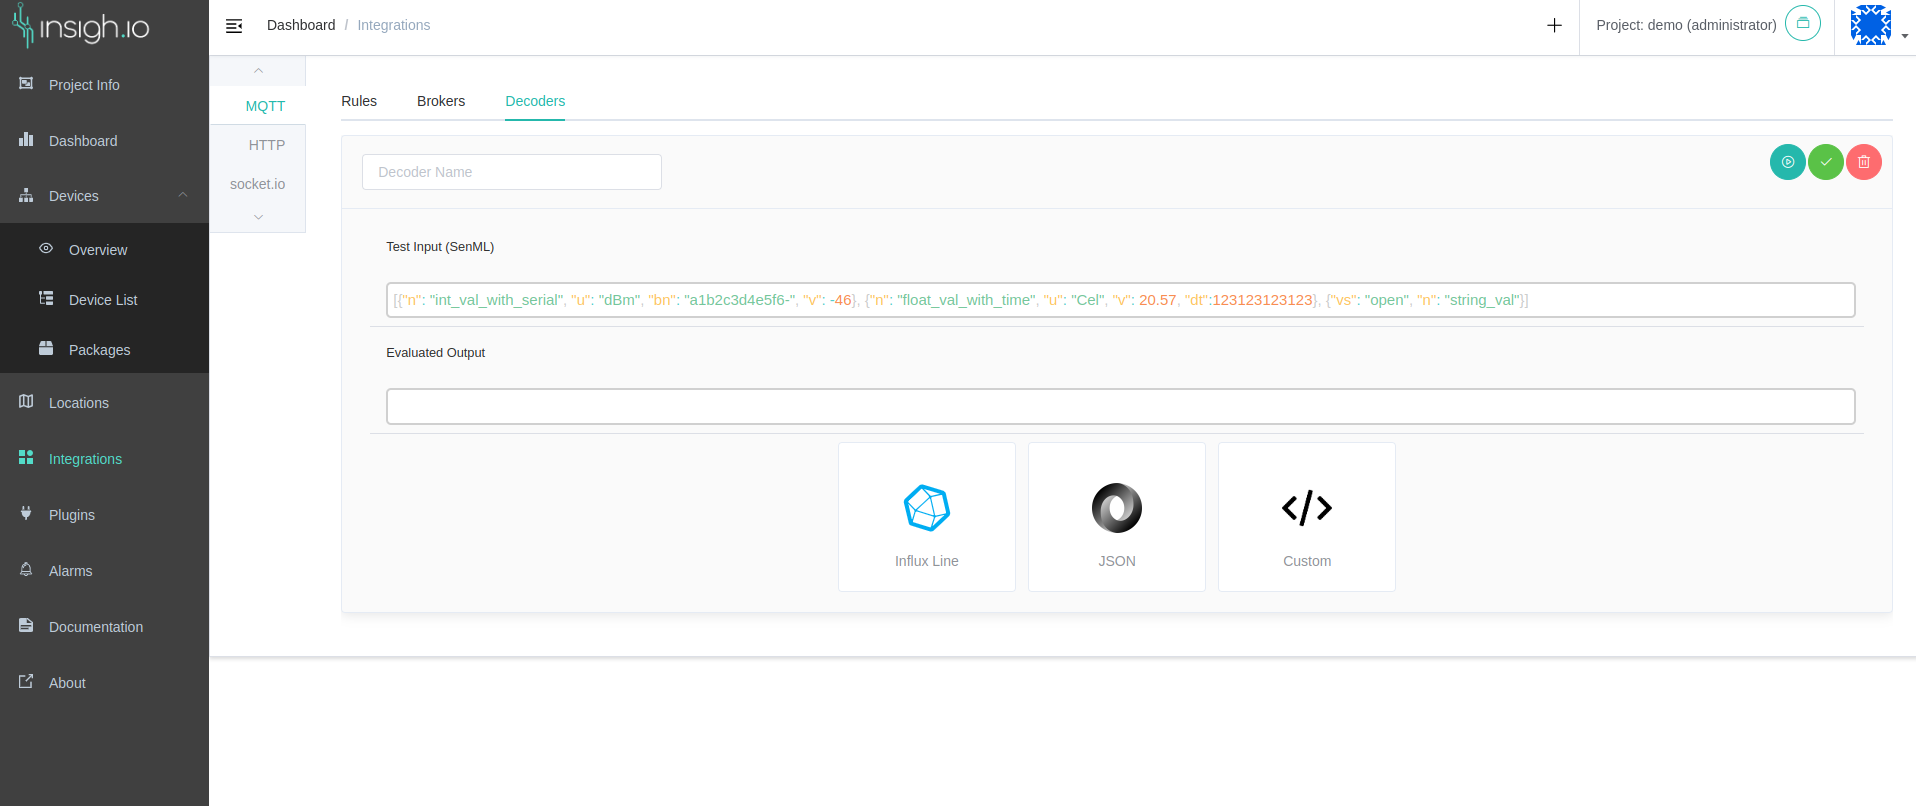
Decoders
Regardless the selected communication protocol, messages can optionally be altered before forwarded to a 3rd party system. This operation is done by setting up a Decoder.
Each decoder is a Javascript callback that is called for every message (or set of messages if the rule is FTP) that is received by a device that is associated to a rule. The decoders for MQTT, HTTP and socket.io have the following interface:
arguments:deviceId: the device ID as provided by the Device Info view.senmlMessage: the raw SenML message as received from the device.
expected return:- any string message. Objects must be stringified before returning.
The FTP decoders, due to the nature of the FTP service expecting a set of messages to be grouped together into a file, have the following interface:
arguments:deviceId: the device ID as provided by the Device Info view.senmlMessages: an array of raw SenML messages that have been received from the device.
expected return:- an object with two properties: filename and content.
By default there are some decoders ready to be used that cover very common cases of message decoding. (the list will be expanded in the future, as requested)
influx DB line: translate into a line that when posted to an influx service will be immediately storedJSON: convert the SenML message into a simple JSON string. Common case is its use in Telegraf.FTP: a generic FTP decoder that converts a set of SenML messages into an FTP file representation by returning the filename and the contents of the file.Custom: an empty callback ready to be coded to user needs
Each implementation can be tested on the fly the evaluating the expressing against an example of input message, returning the result in the Evaluated Output field.
The registered decoders can be used across transfer protocols. For example, the same JSON decoder can be re-used in MQTT and HTTP rules. This does not stand for decoders intended to be used for FTP rules, because of the different interface.
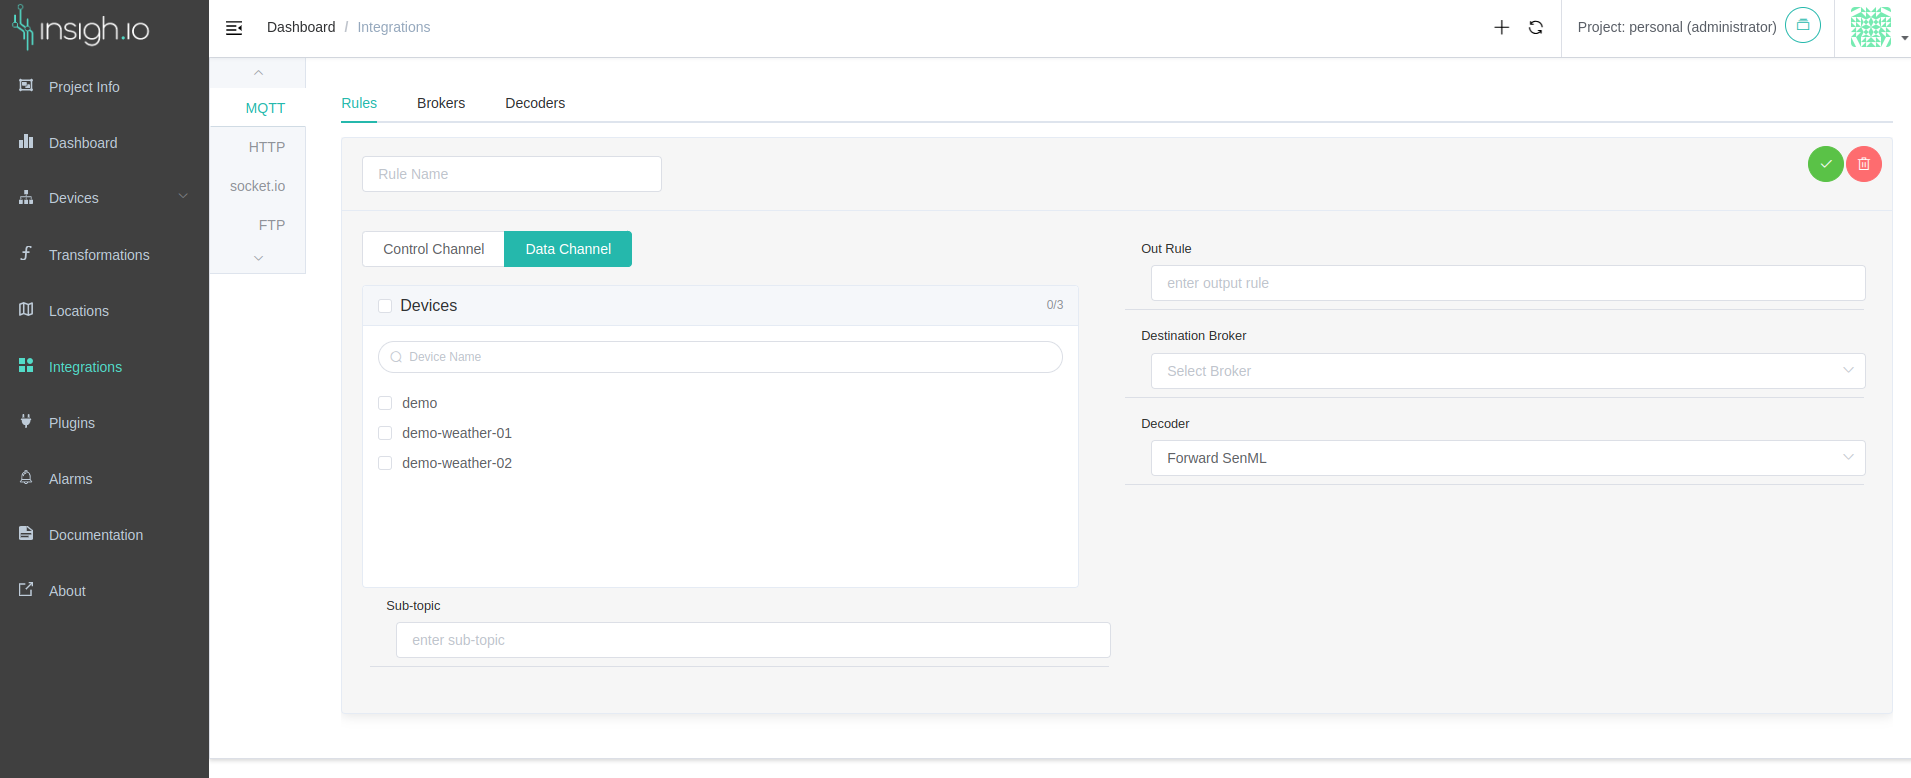
Setting up rule with message filter
The final step is to create a Rule. In the Rule setup, the user defines the devices for which the rule will listen for messages, the outgoing path (if applicable), the destination (MQTT broker for MQTT rules, HTTP server for HTTP rules) and optionally a Decoder.
Devices: a list of devices for which the rule will listen for messagesSub-topic: (optional) whether the rule will listen to a specific subtopic for these devices. This is useful for listening to specific control messages or transformation messagesOut Rule: (applicable only for MQTT integrations) the MQTT topic of the remote MQTT broker where the message will be publishedDestination Broker,HTTP Hook,FTP Server: select the previously configured 3rd party system detailsPath: (applicable only for FTP integrations) define the directory where the FTP file will be uploadedDecoder: select the active decoder to be run for each message
When the Rule is created, it is marked as Active. Each rule can be paused or started by editing the rule and pressing Pause or Play button.