Configure Device
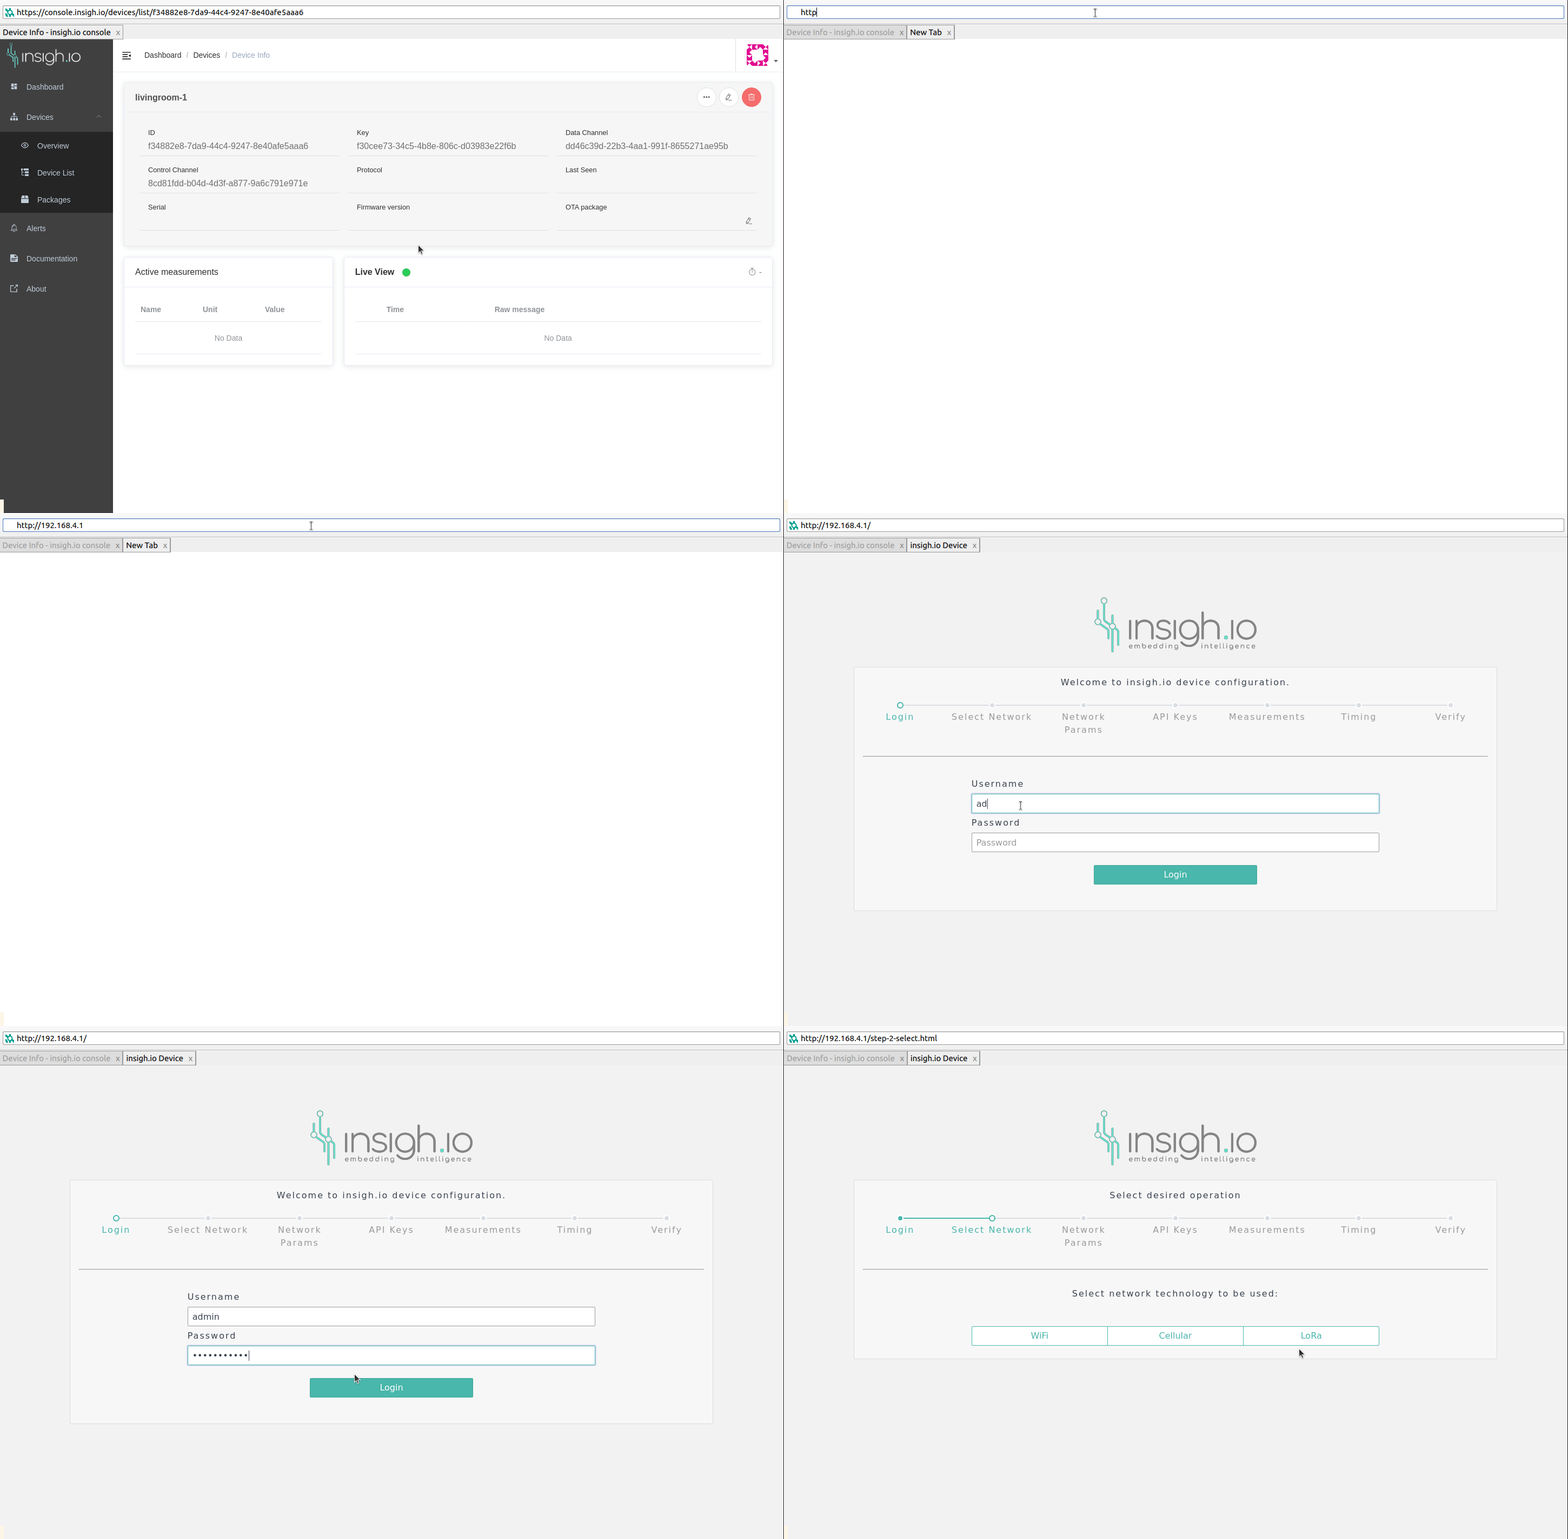
By completing the previous step, a device has been created and provisioned in the platform. In this step, using the generated security keys, the physical device will be configured to start running the demo code and periodically upload measurements. To do so, we will connect to the device via WiFi, open then guided Web UI and apply our configuration.
The key configurations that will be edited are:
- Network type selection (WiFi, Cellular, LoRa)
- Selected network parameters
- Communication protocol
- Measurement period duration
- Security Keys
- Enabled measurements
Web UI
The configuration will be done through Web UI. Web UI is a web-based step-by-step wizard that runs on the microcontroller providing all the necessary configuration options. By completing the wizard, a configuration file will be created in the path: /apps/demo_console/demo_config.py. It will be automatically used by the microcontroller to run the desired scenario.
How to enable WiFi Access Point mode
The Web UI of insigh.io board is accessible only after a hard reset (power off/on). During this procedure, the board becomes a WiFi Access Point and waits for connections.
Each board broadcasts a WiFi SSID with format insigh-<last 4 digits of mac address> (ex. insigh-5fa1) with password: insighiodev
WiFi Access Point mode indicator
The WiFi Access Point is ready for connection around 5-10 seconds after power on. Its ready state is identified by the LED that blinks purple. As soon as a client is successfully connected to the Access Point, the LED will remain purple without blinking.
WiFi Access Point mode timeouts
The WiFi Access Point will remain active for:
- 50 seconds, if no WiFi client gets connected
- 5 minutes, if any WiFi client gets connected
How To
- power on board or hard-reset through the corresponding switch on the board.
- Make sure the power switch is at the on position
- the WiFi Access Point is ready to accept connections when the SSID gets listed on the WiFi discovery on the host machine
- Pycom: the LED on the Pycom board starts blinking purple
- connect via WiFi to the broadcasted SSID (ex. insigh-5fa1) with password: insighiodev
- (Pycom) wait for the LED to become purple without blinking. Now the Web UI is ready to be accessed.
- open the Web UI URL: http://192.168.4.1
- login with
- username: admin
- password: insighiodev
- Select Network type for data exchange:
