Device Info
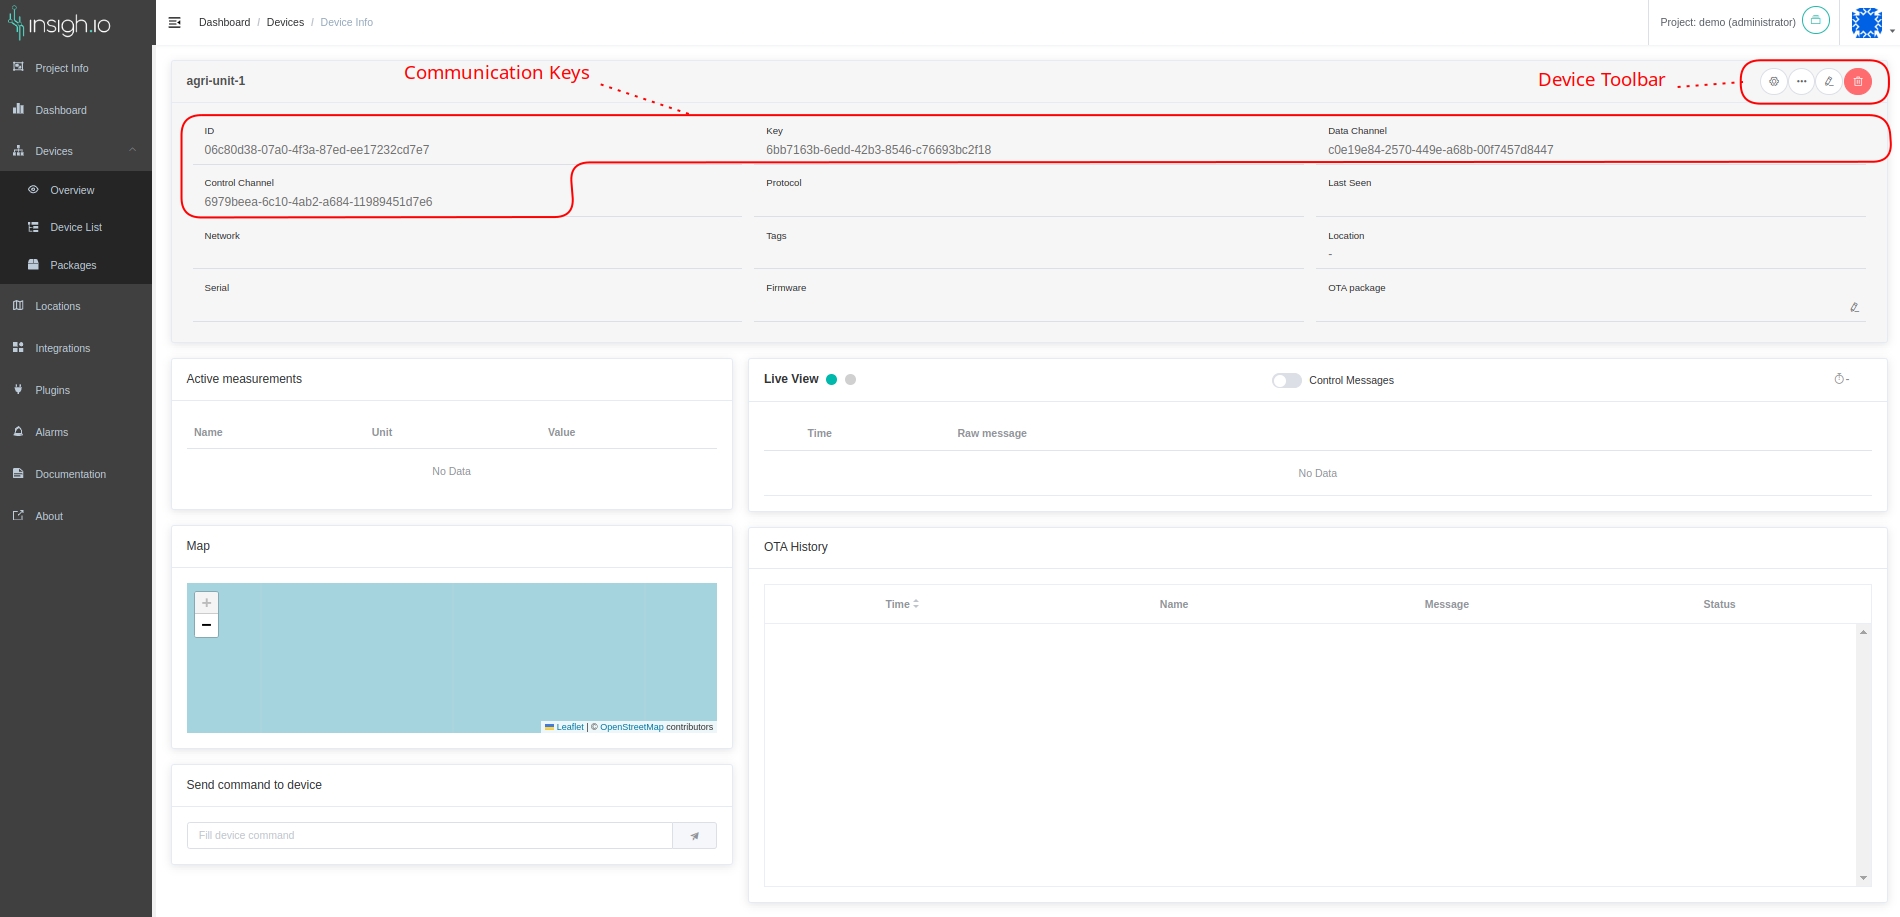
In the previous step, the device agri-unit-1 has been created and clicked to enter the Device Info view.
The Device Info view is the place where the user can view:
- The device communication keys, which include:
- The device ID and Key, which are the device’s credentials used to authenticate and authorize the device on the Console
- The control and data channel that are provisioned for the project and allow the device communication with the Console
- Other device details, like
- The protocol and network used by the device to send measurements
- When the device was last seen (i.e., sent measurements)
- The device’s location (if explicitly set in the device creation form)
- The device’s firmware and OTA package, if applicable
- Last measurement (Active measurements card), which shows the last measurements sent by the device
- Live incoming messages (Live View card), which shows incoming measurements from the device in real time. Users are also able to view control messages (i.e., messages in the control channel) if the relevant radio button is enabled.
- The device’s location (Map card), which shows a valid location if the device sends GPS information.
- The OTA history, which shows all OTA operations and their relevant status
The Device Info view also allows the following actions:
- Edit the device
- Delete the device
- OTA request
- Remote configuration request
- Send a command to the device
Device Configuration
The device has been created on the Console and the relevant communication keys have been generated. Now, the IoT device needs to be configured to properly communicate with the Console.
insigh.io IoT Device
If the device is an insigh.io one, the configuration is done via WiFi using the web application that is embedded in the firmware. The procedure is described in Configure Device. The configuration installs the communication keys, sets up the measurement schedule and defines the measurement parameters. Once the configuration is completed, the device can start sending measurements to the Console.
Third-party devices
The configuration of a third-party device should follow the instructions of the relevant vendor. To communicate with the Console, usually a Plugin service should be configured and associated with the device during the creation process.
Sending Data
If the device is properly configured, it will start sending data once it is turned on, according to its configuration. For this tutorial, we will send some dummy data using the Communication Keys (ID, Key, Data Channel) to act as a device. This will test the end-to-end communication and will populate the corresponding fields of the view.
To send a dummy message acting as the device, some Quick Data Commands are provided to get started and can be accessed by the three-dotted button in the Device Toolbar. (Their format, fields and usage will be explained in the next page where the Device Communication is analyzed.)
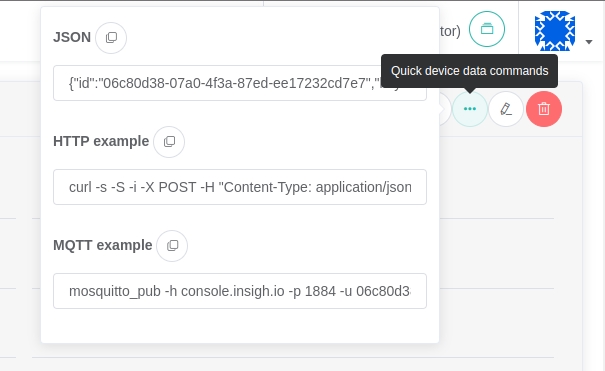
For this example, the message will be sent over HTTP so by pressing the copy button next to the HTTP example the following command is ready to be used (uses curl tool). Note that you can modify the SenML-formatted message to simulate the required type of measurements to be sent.
curl -s -S -i -X POST -H "Content-Type: application/json" -H "Authorization: 6bb7163b-6edd-42b3-8546-c76693bc2f18" https://console.insigh.io/http/channels/c0e19e84-2570-449e-a68b-00f7457d8447/messages/06c80d38-07a0-4f3a-87ed-ee17232cd7e7  -d '[{"bn":"ffffffff-", "n":"test","u":"V","v":1}]'

HTTP/2 202
server: nginx/1.25.0
date: Thu, 14 Nov 2024 09:42:51 GMT
content-length: 0
The successful execution of the command means that the message has been sent to the console.insigh.io platform, it is stored in the DB and will be displayed in the live view.
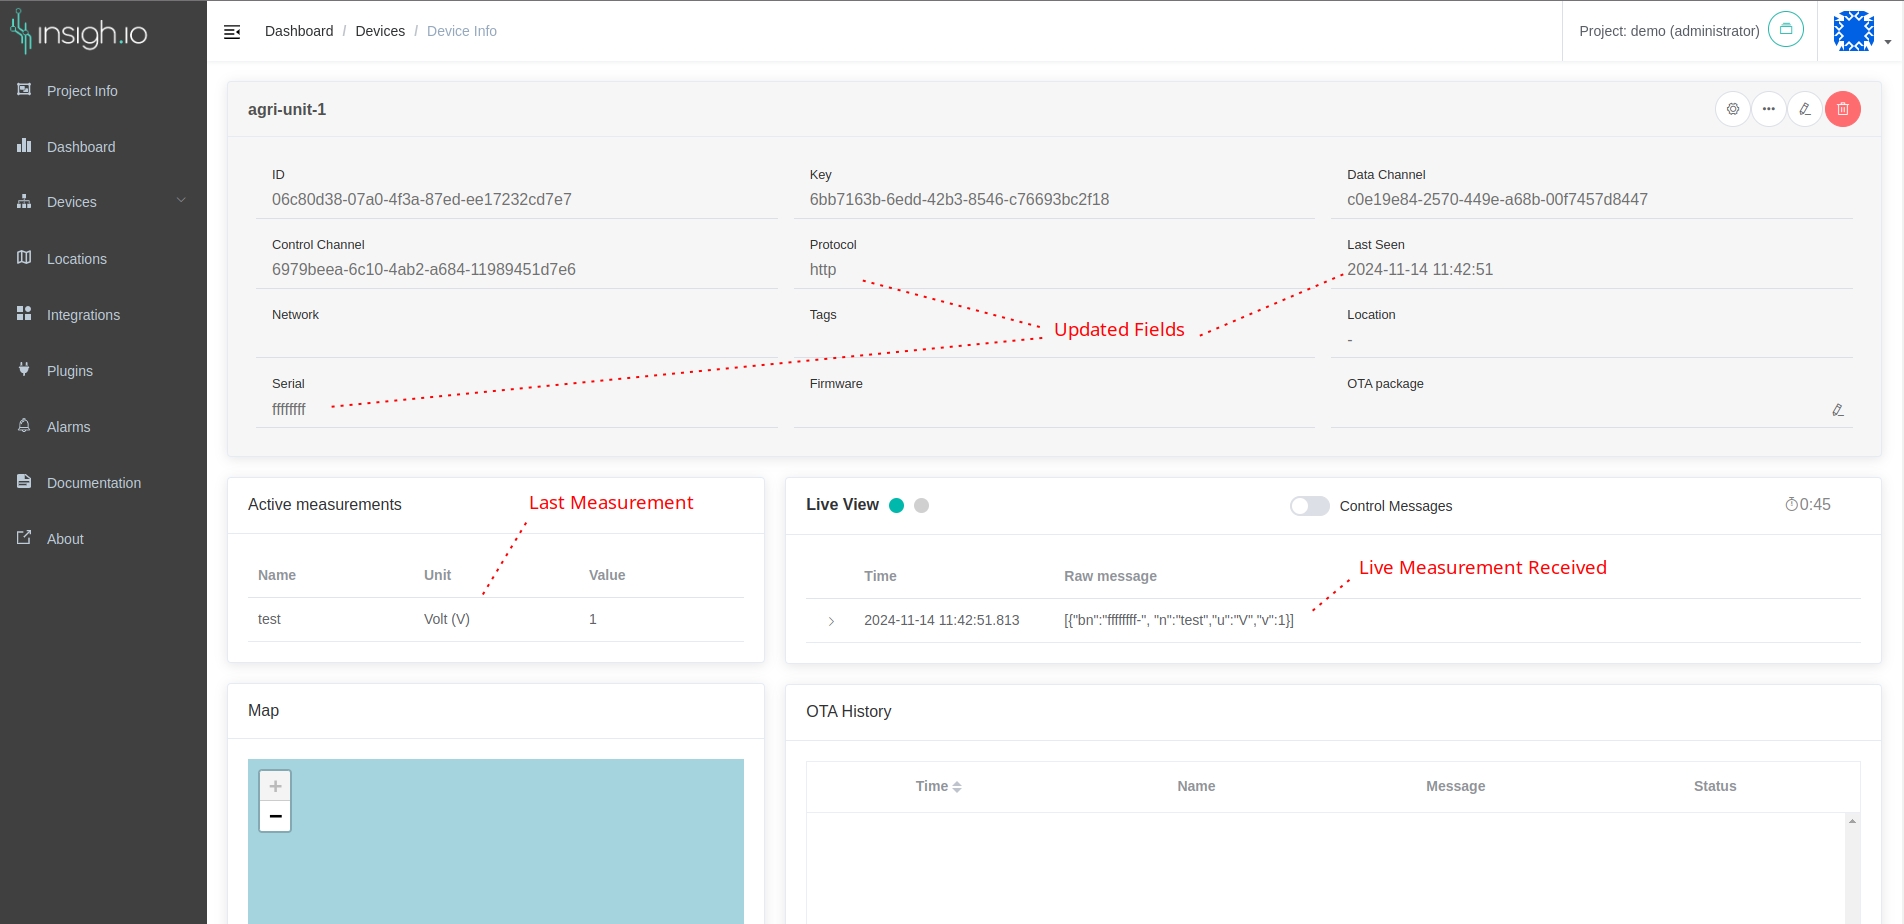
On each incoming message event (or page refresh), happens the following procedure:
- The message is received by the Live View in raw format (if the view is open when the device sends the message)
- Updates the Active Measurements
- Updates the device details like Last Seen field
Act on device
Apart from displaying the device status and some basic controls such as Device Edit/Delete, more advanced tools are provided such as Remote Configuration and Over-the-Air Updates.
OTA Update
OTA update is supported for insigh.io devices, running the insighio firmware
🔐 Project viewers are not allowed to perform OTA requests.
Previously registered OTA packages through the Packages page, can be assigned to the device. Use the edit button to enable the dropdown list, select the desired and press Apply. After applying each package, the status report of the OTA is expressed by the notification icon placed next to the OTA package label.
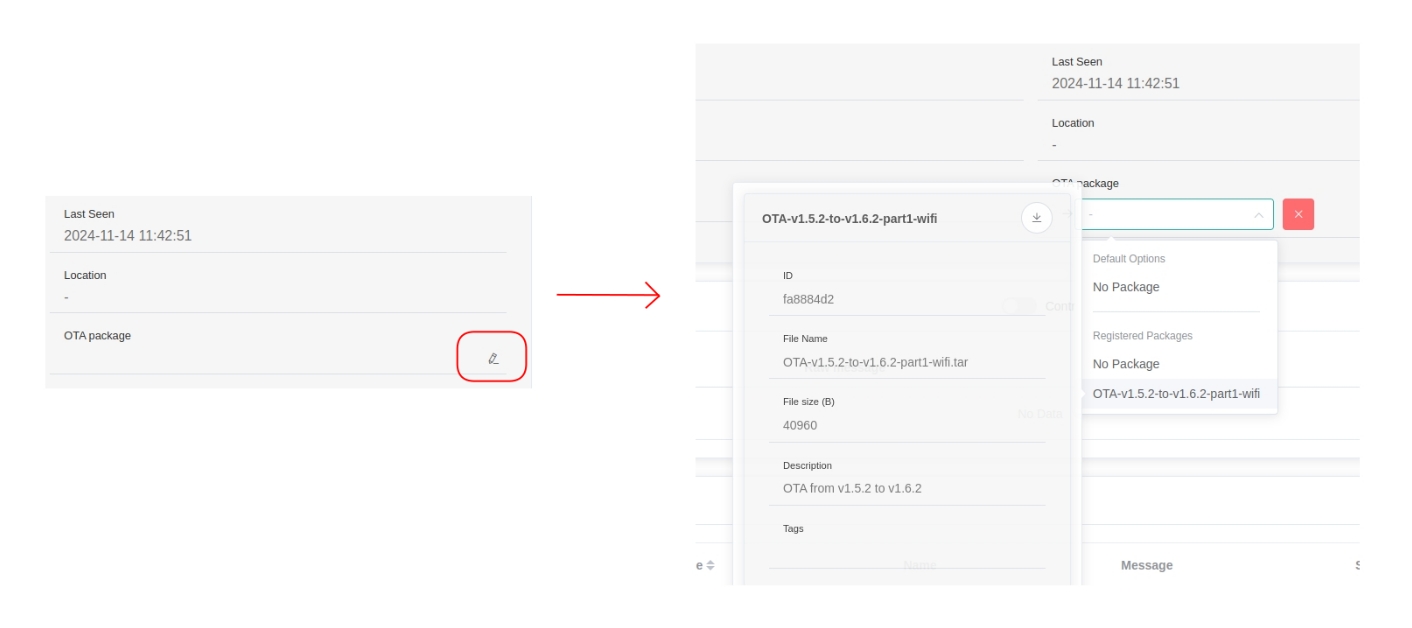
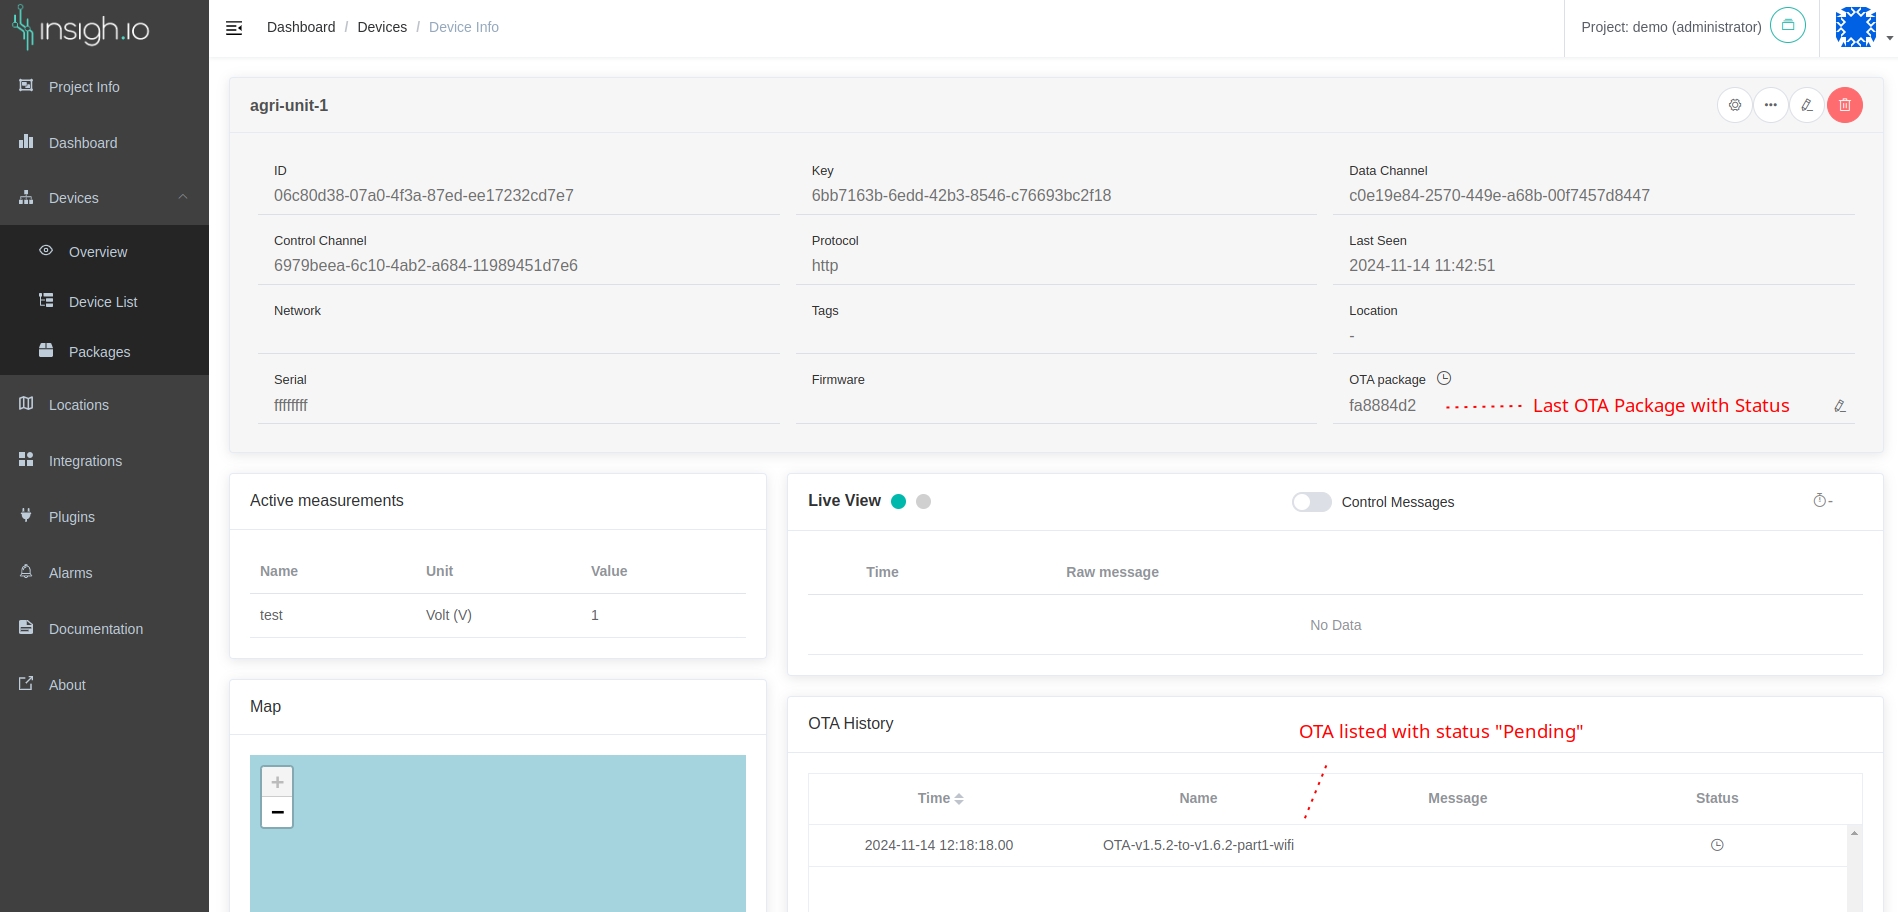
To cancel a pending OTA request, select from the dropdown menu the “No Package” option and click “Cancel” button.

Remote Configuration
Remote configuration is supported for insigh.io devices, running the insighio firmware.
🔐 Project viewers are not allowed to perform Remote Configuration.
While with OTA updates it is possible to update the device’s firmware to extend its capabilities, in some cases we simply want to change the device configuration to adapt to the needs of the user scenario. In such cases, Remote Configuration is supported to send request to change device capabilities, measurement timing, connection details etc.
In a typical workflow, the device will be locally configured before it is deployed on the field. This step is described in Configure Device. After the device is deployed, it sends its initial configuration to the Console. While the device is deployed, we can use the Remote Configuration feature to tweak the device behavior. For convenience, the same configurators run on the device and on the Console.
The Device Configuration Wizard can be opened by the Device Toolbar.
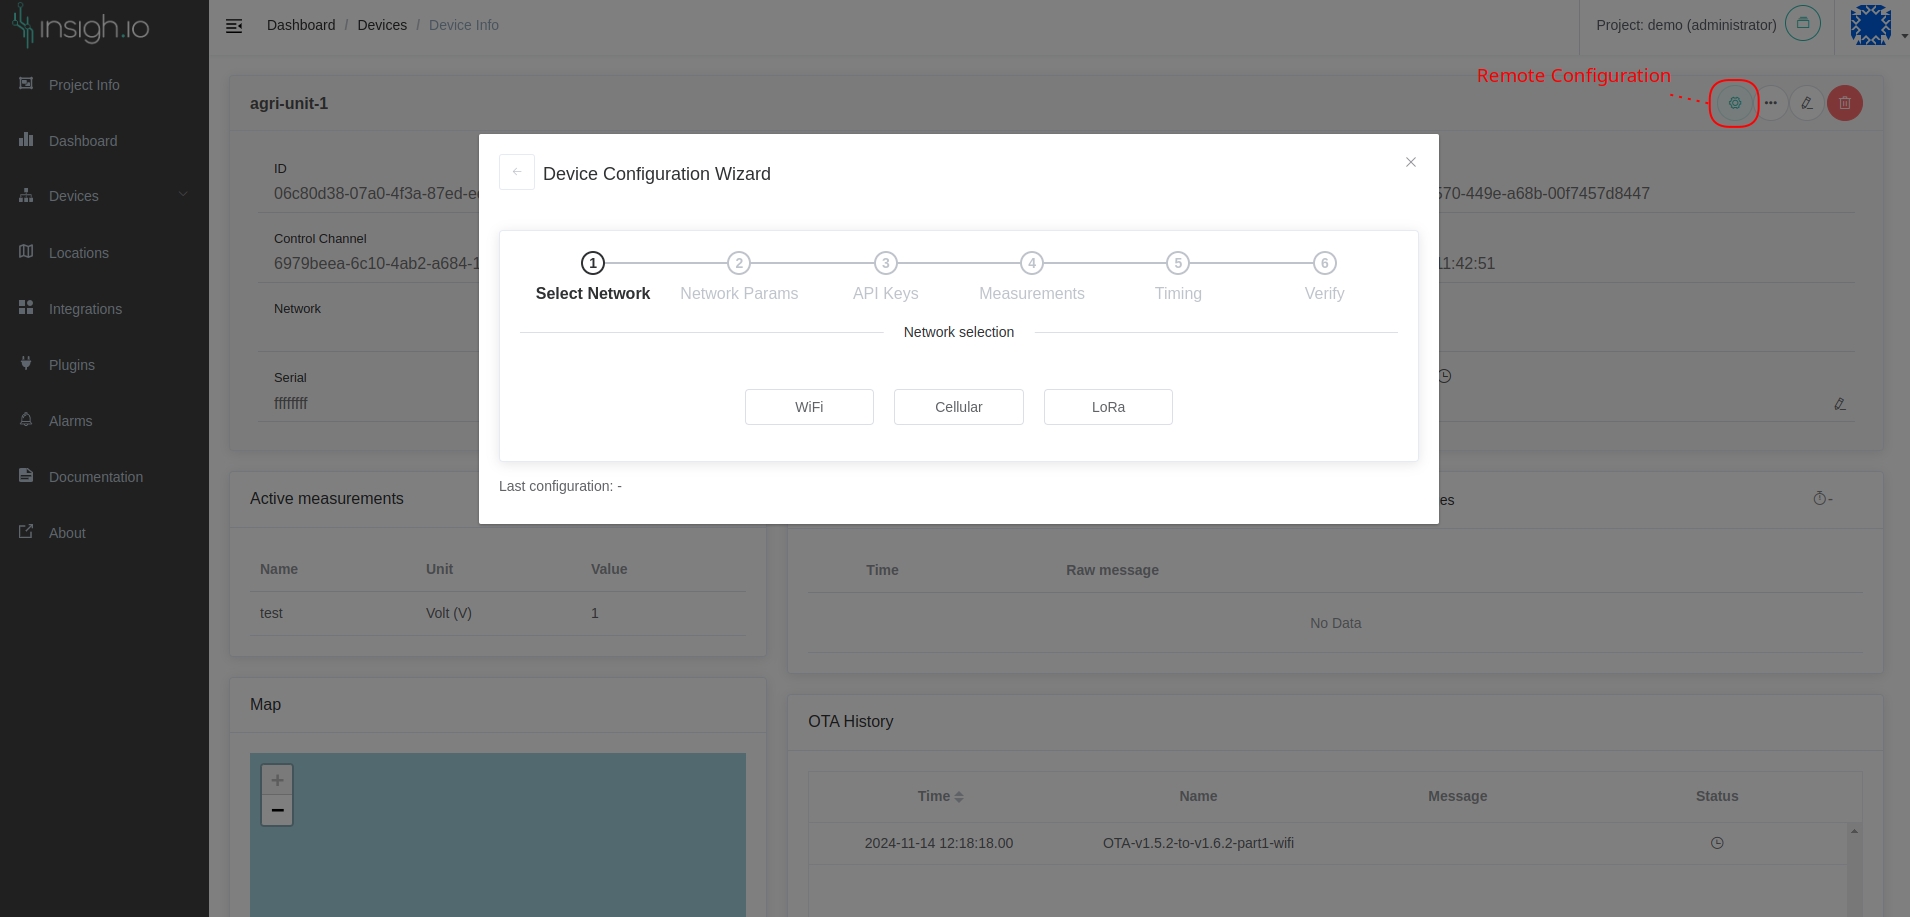
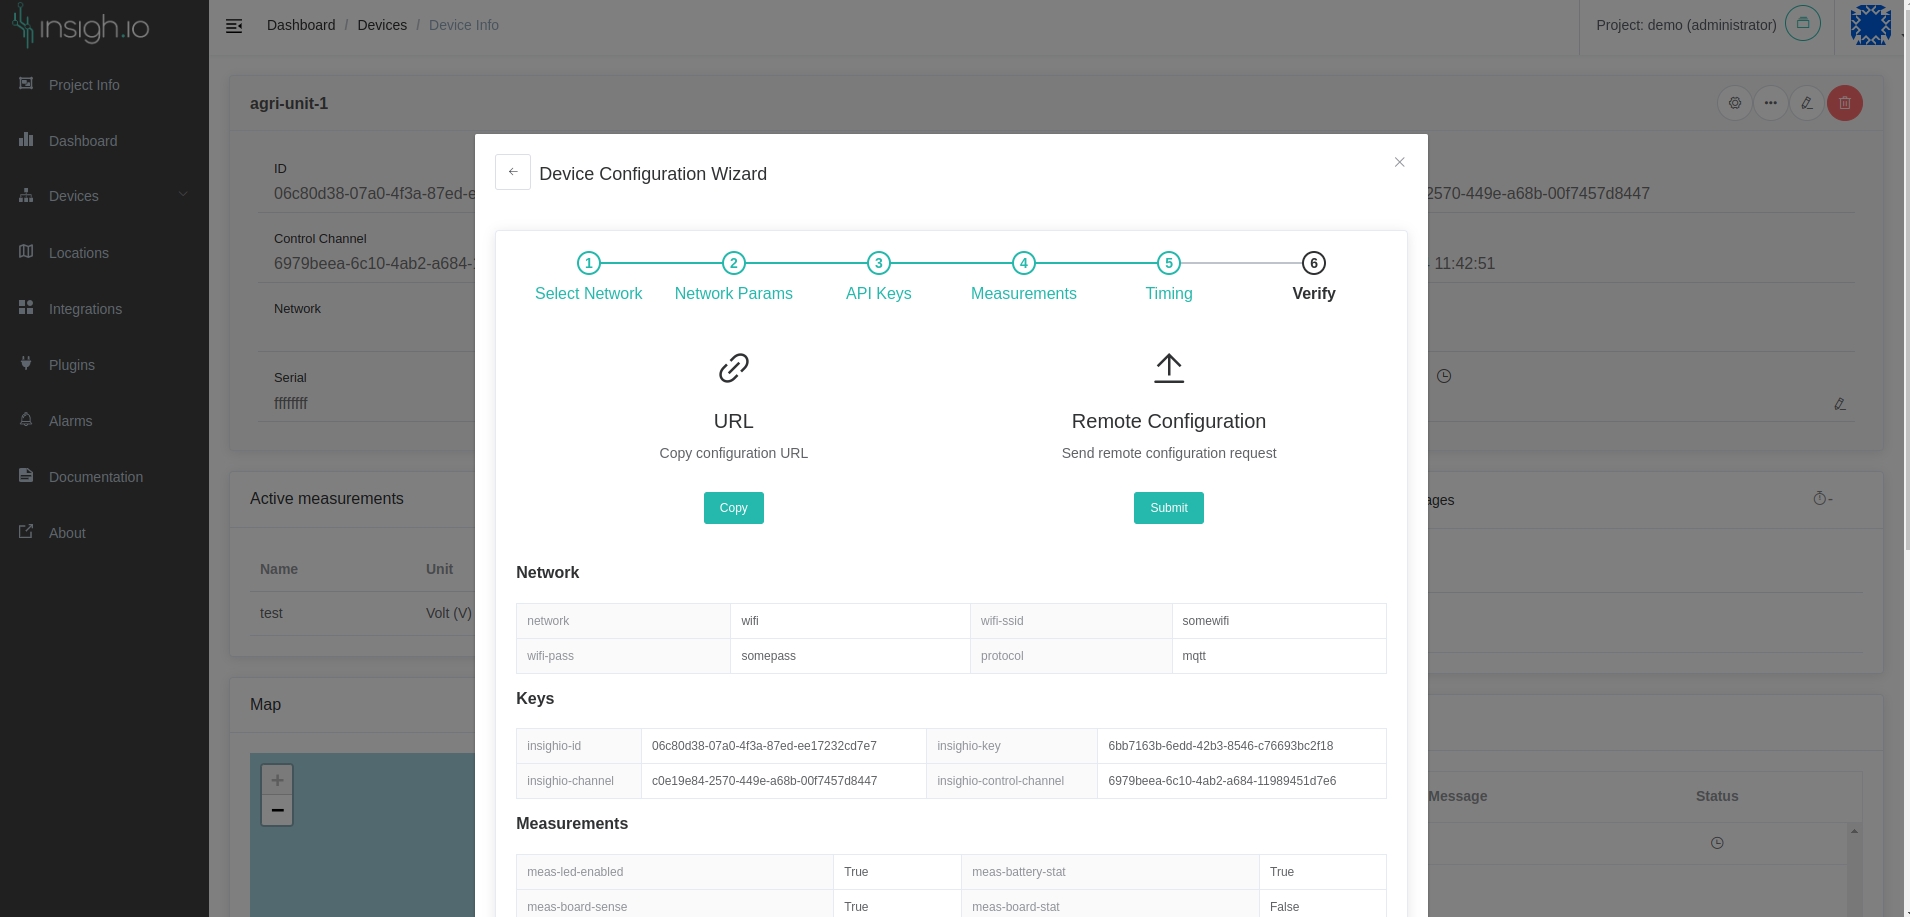
After completing all the steps of the wizard, the final configuration page is shown, which has 2 options:
- URL: Get a copy of the configuration URL. This URL can be used when connected on the device’s hotspot to directly pass the configuration without running the local wizard.
- Remote Configuration: Send remote configuration request to the device. The device that is running insighio firmware will receive the request during the next measurement cycle. By the time it is applied, the device is reset and will start running with the new configuration.
In the next article, the supported communication protocols will be presented.