Projects
Overview
A project is the higher-level entity that groups together other entities and services. Devices, channels, dashboards, integrations, plugins and alarms are all linked to a specific project. Users may have access to multiple projects and projects can be shared across multiple users with different roles.
When a user registers to the Console, a new project is created by default. Users can create more projects as shown below. Project administrators can also add other users (via invitations) to the project by also assigning them the appropriate role for access control.
User Roles
User roles are used to authorize access to a project. User roles are defined at the project level and are the following:
- Administrators have full project access. They can view, edit, create and delete entities and services within the project. Administrators can also invite other users to the project. When a user creates a new project, they are also administrator of the project.
- Editors can view, edit and create entities and services within the project. They do not have the delete permission.
- Viewers can only view entities and services within the project.
Create a Project
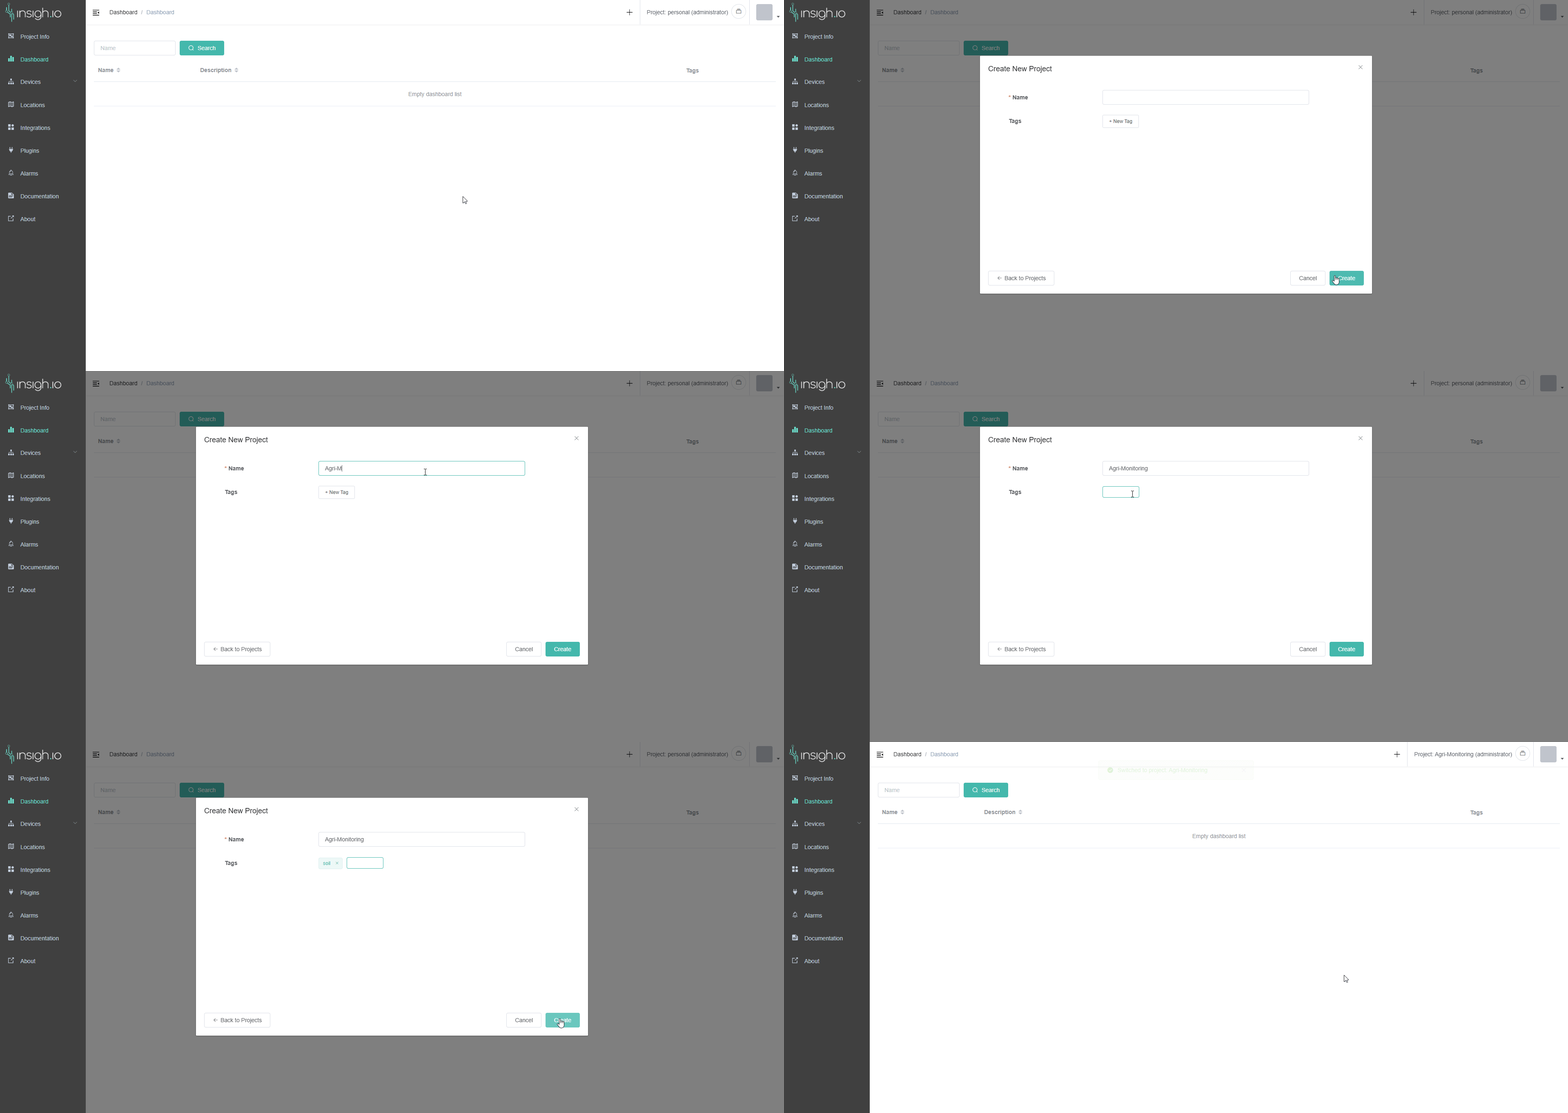
Projects can be created via the Projects dialog at the right side of the NavBar. When creating a new project, users can specify:
- The project name
- Any project tags (optional)
The creator of a project automatically has the administrator role in the project.
Having multiple smaller projects instead of a few bigger ones is a good practice. It allows to group together devices that conceptually are related and also allows for more fine-grained access control.
It is not possible to combine information from different projects. For example, it is not possible to define a dashboard that shows data from devices that are created in different projects.
Project Info
The Project Info view shows information on the current project. From this view, users can edit the project (name and tags) as well as add other users to the project (via invitations).
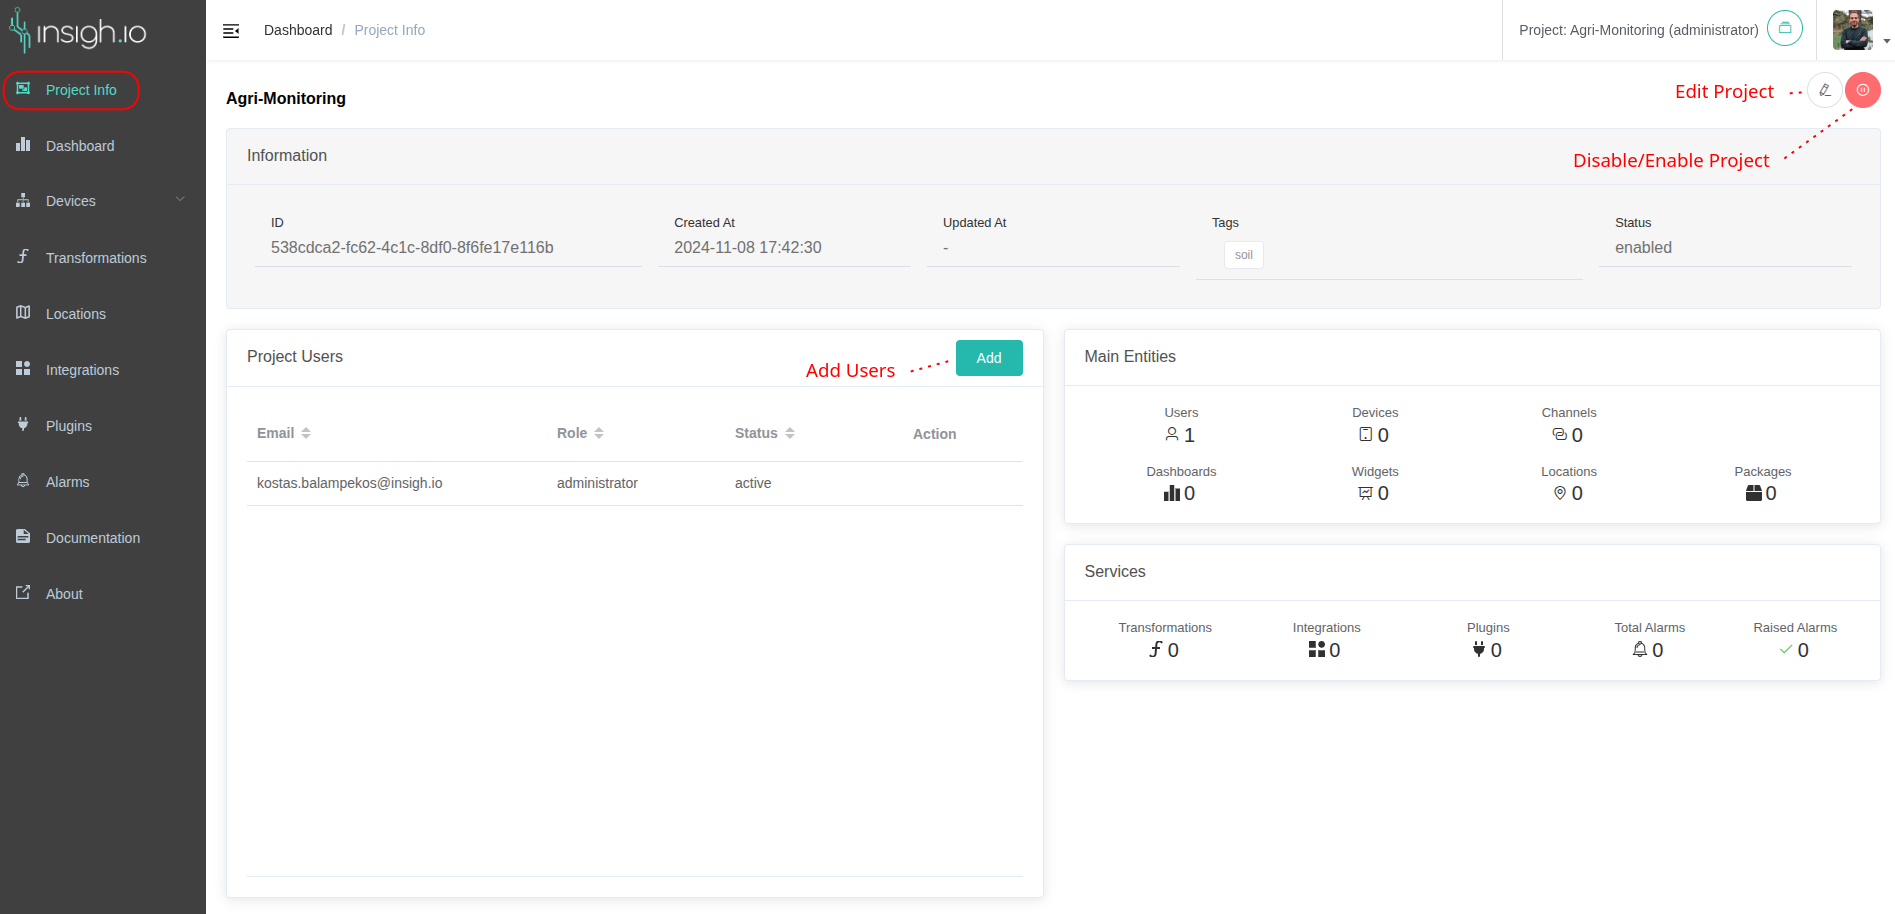
The top card shows the project attributes:
- The project id
- The project creation date
- The project last update date
- The project tags
- The project status
The bottom left card shows the project users:
- The user email
- The user role in the project
- The user status, which can be either “active” or “pending”
- “active” users are the ones that have successfully joined the project
- “pending” users are the ones that have been invited to the project but have not yet accepted the invitation
- The “Remove” column allows for user removal from the project. Only project administrators can remove other users from the project.
Edit a Project
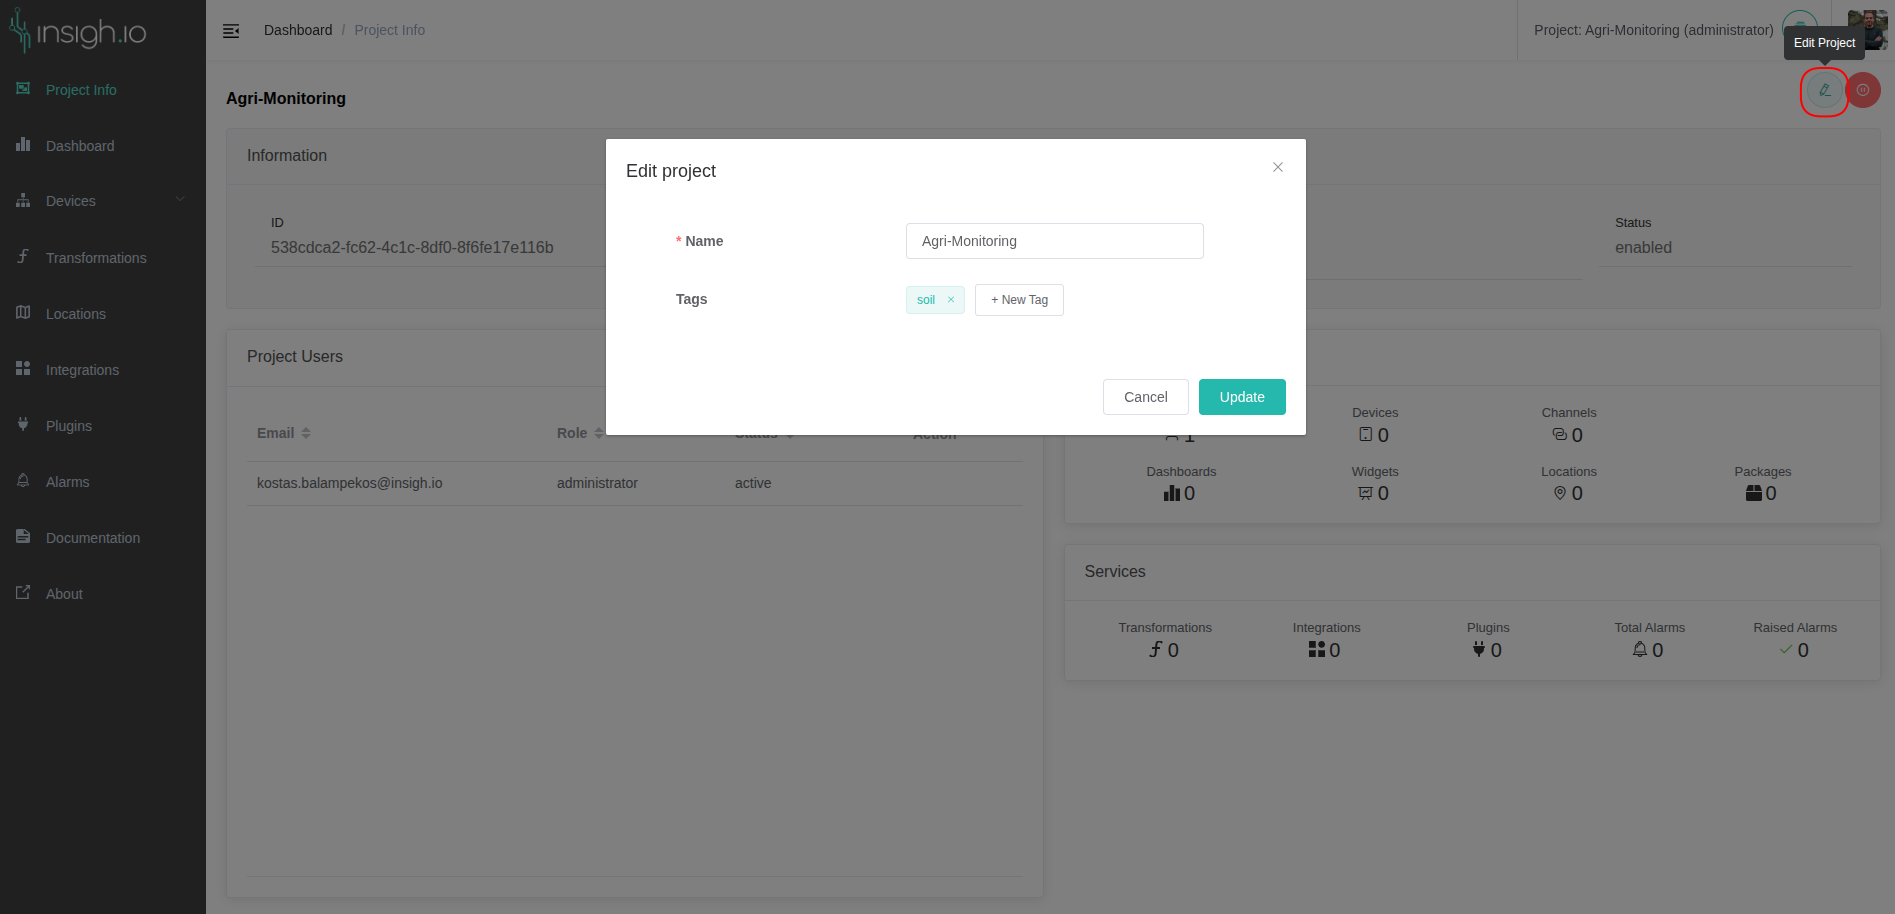
To update a project, go to the “Project Info” view and click the edit button at the right of the screen. The project name and the project tags can be updated. Users with the “viewer” role cannot update the project.
Add Users to Project
Project administrators can add other users to the project and assign them the appropriate roles for access control. The users are invited to the projects and can either accept or reject the pending invitation. The invited users must have registered to the Console before, otherwise the invitation request will fail. Note that currently, the invitation is not sent by email. Rather, the invited user will be notified when they login to the Console.
To add a user to the project (i.e., send an invitation), click the “Add” button at the “Project Users” card. Then, specify the email of the user (the email that they used to register their account to the Console), as well as the user’s role in the project that specifies their permissions.
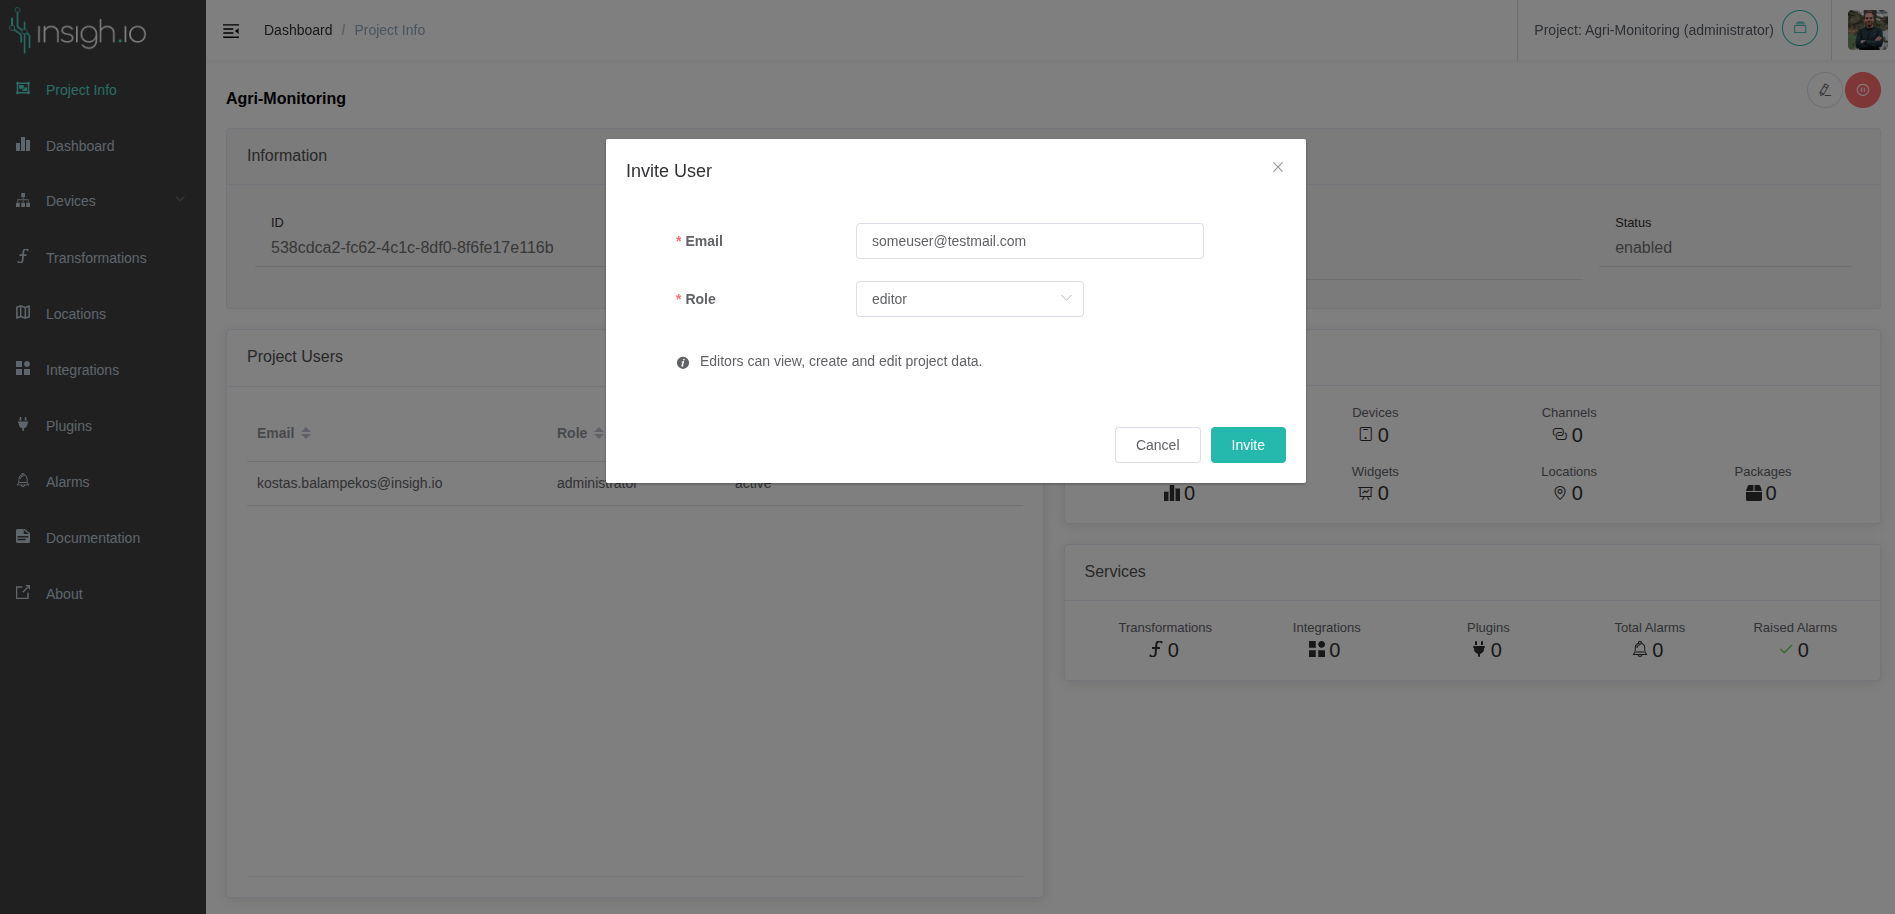
Now, the other user will need to accept the invitation to join the project. Upon user login, they are notified if there are pending invitations in two ways:
- An information message is shown at the top of the screen
- A red badge is shown in the Projects button at the right of the navbar at the top of the screen
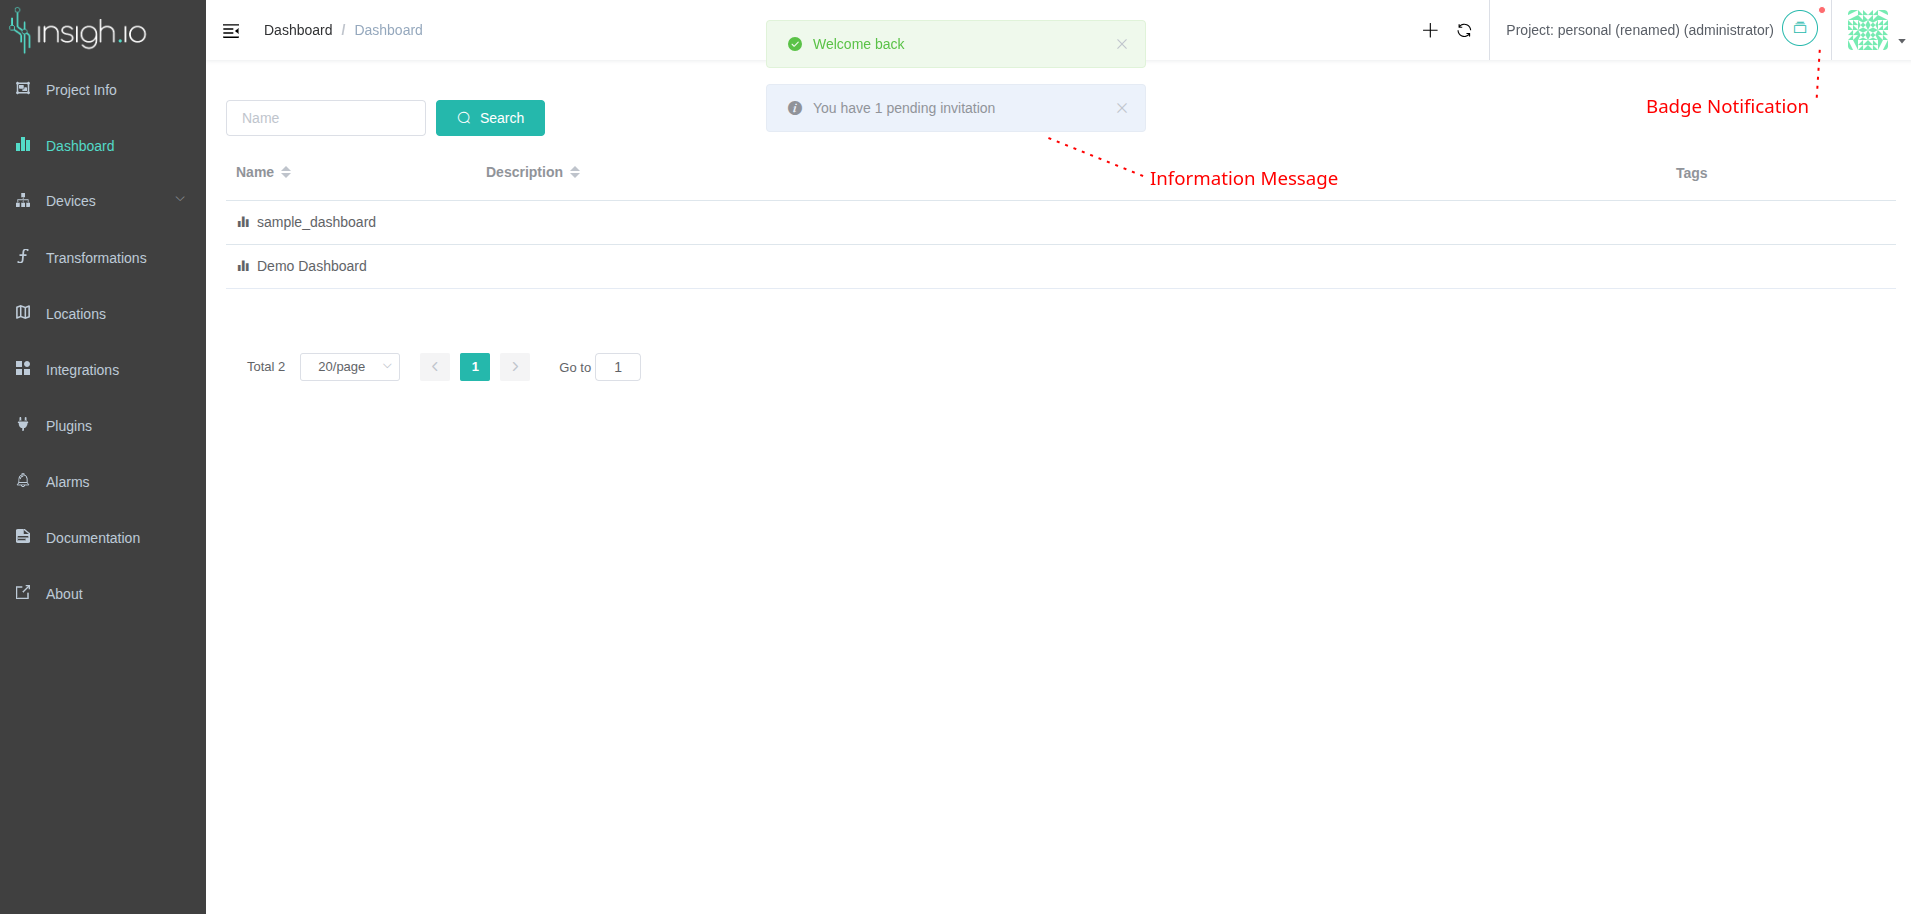
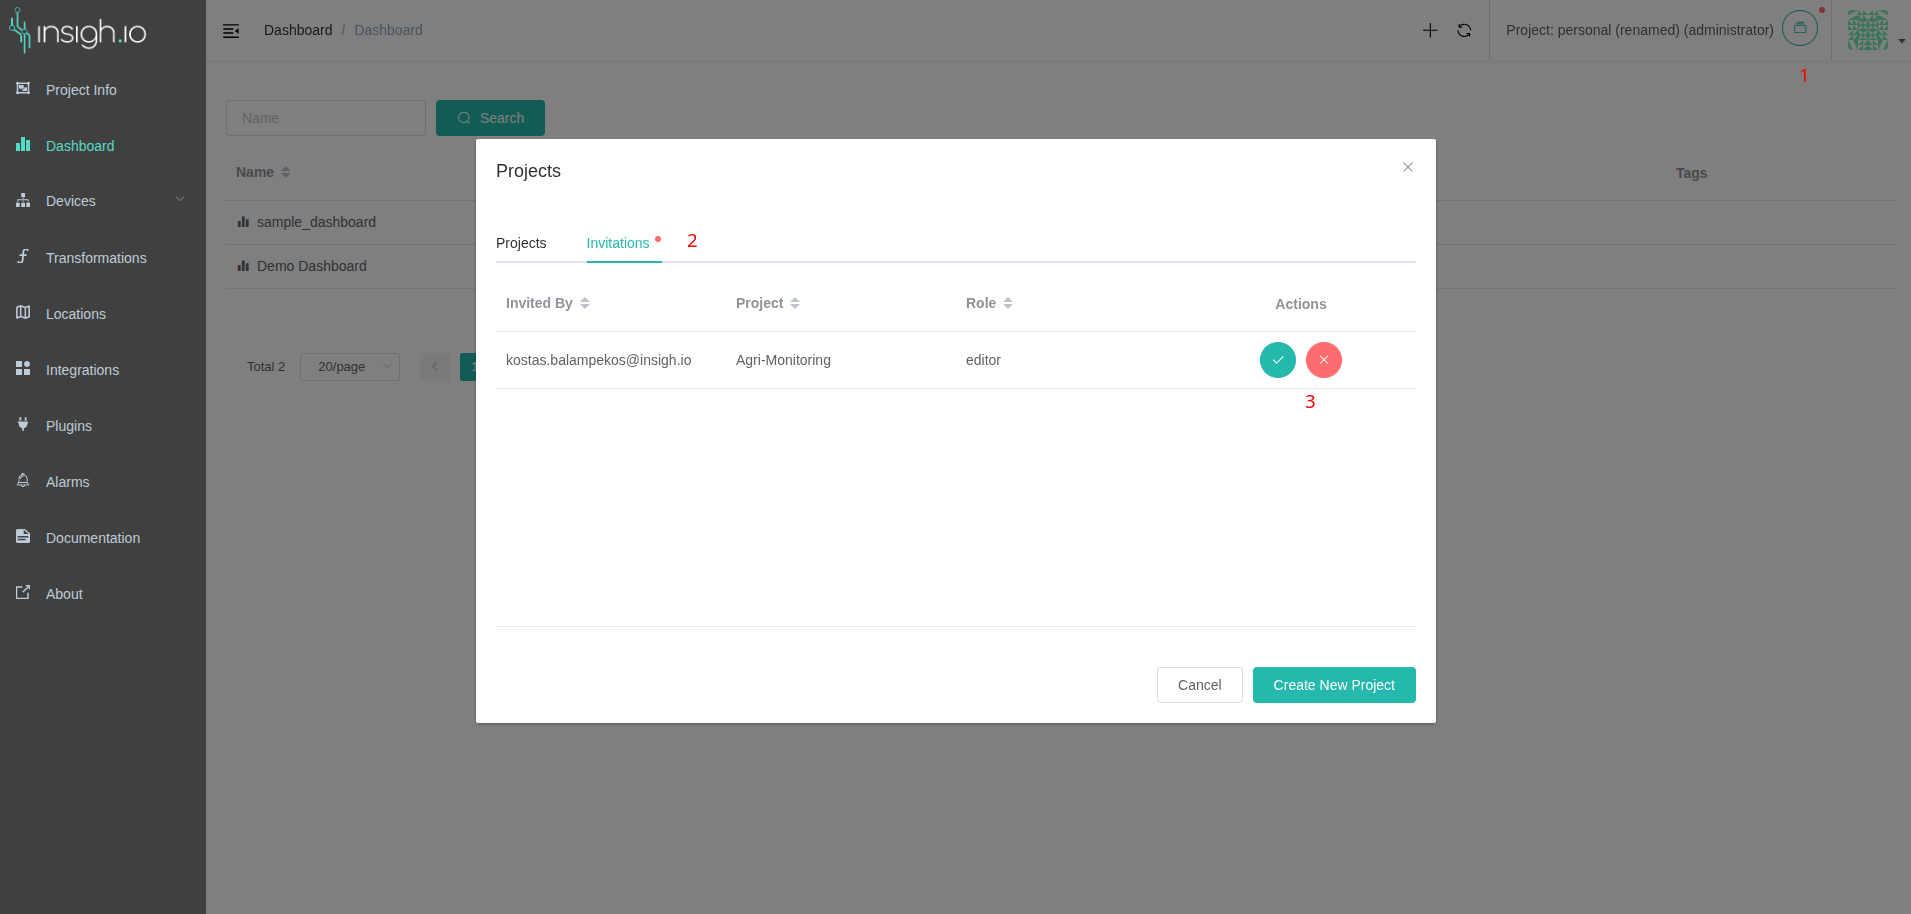
To reply to the invitation, the invited user needs to click the Projects button at the top right of the screen (must have a red badge as shown above), click the invitations tab and accept or reject the invitation.
Switching projects
Users can switch between projects by selecting the active project via the Projects dialog that opens with the button at the top right of the screen.
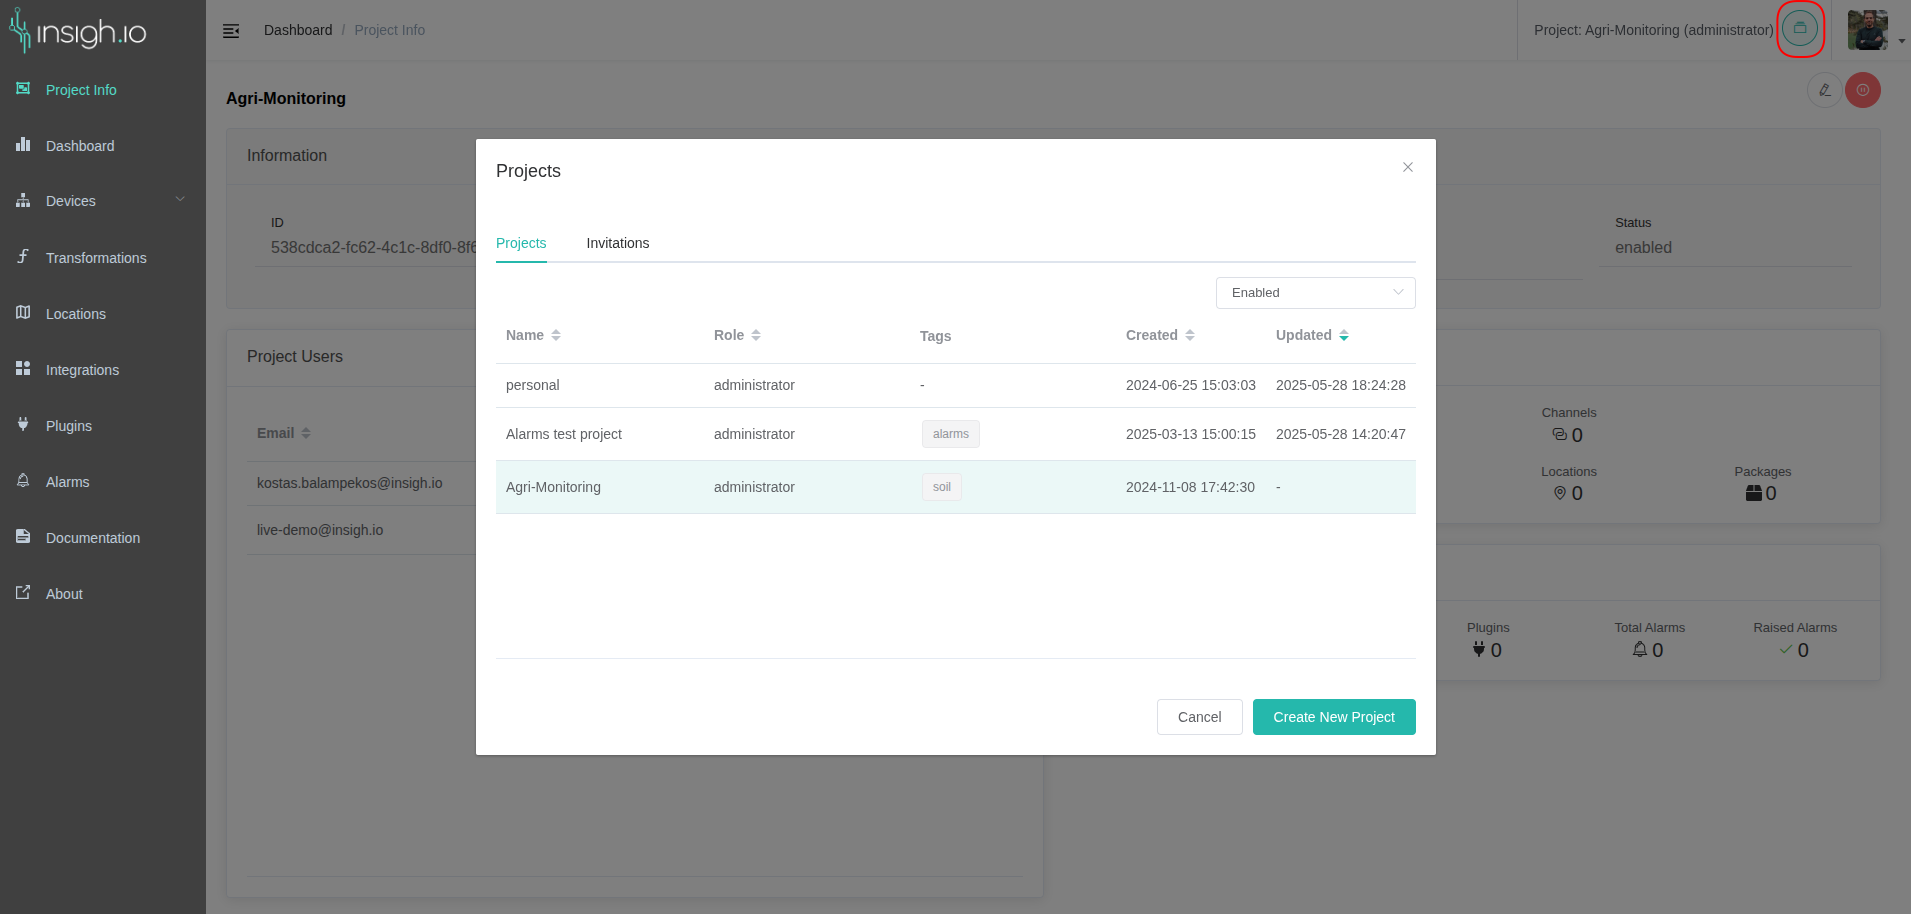
The dialog shows:
- The projects that the user has joined, along with the user’s role in each project, the project tags, the project creation and update dates. The projects list can be filtered based on the project status (enabled or disabled). The current project is also highlighted in the list.
- The pending invitations that the user needs to reply (accept or reject).
To switch to a different project, open the projects dialog and click on the desired project.
Disable a project
When a project is disabled, only project administrators can login to the project and perform any action. Editors and viewers are not allowed to access the project, its entities and services. To disable a project, switch to the project, visit the Project Info page and click to the Disable Project button.
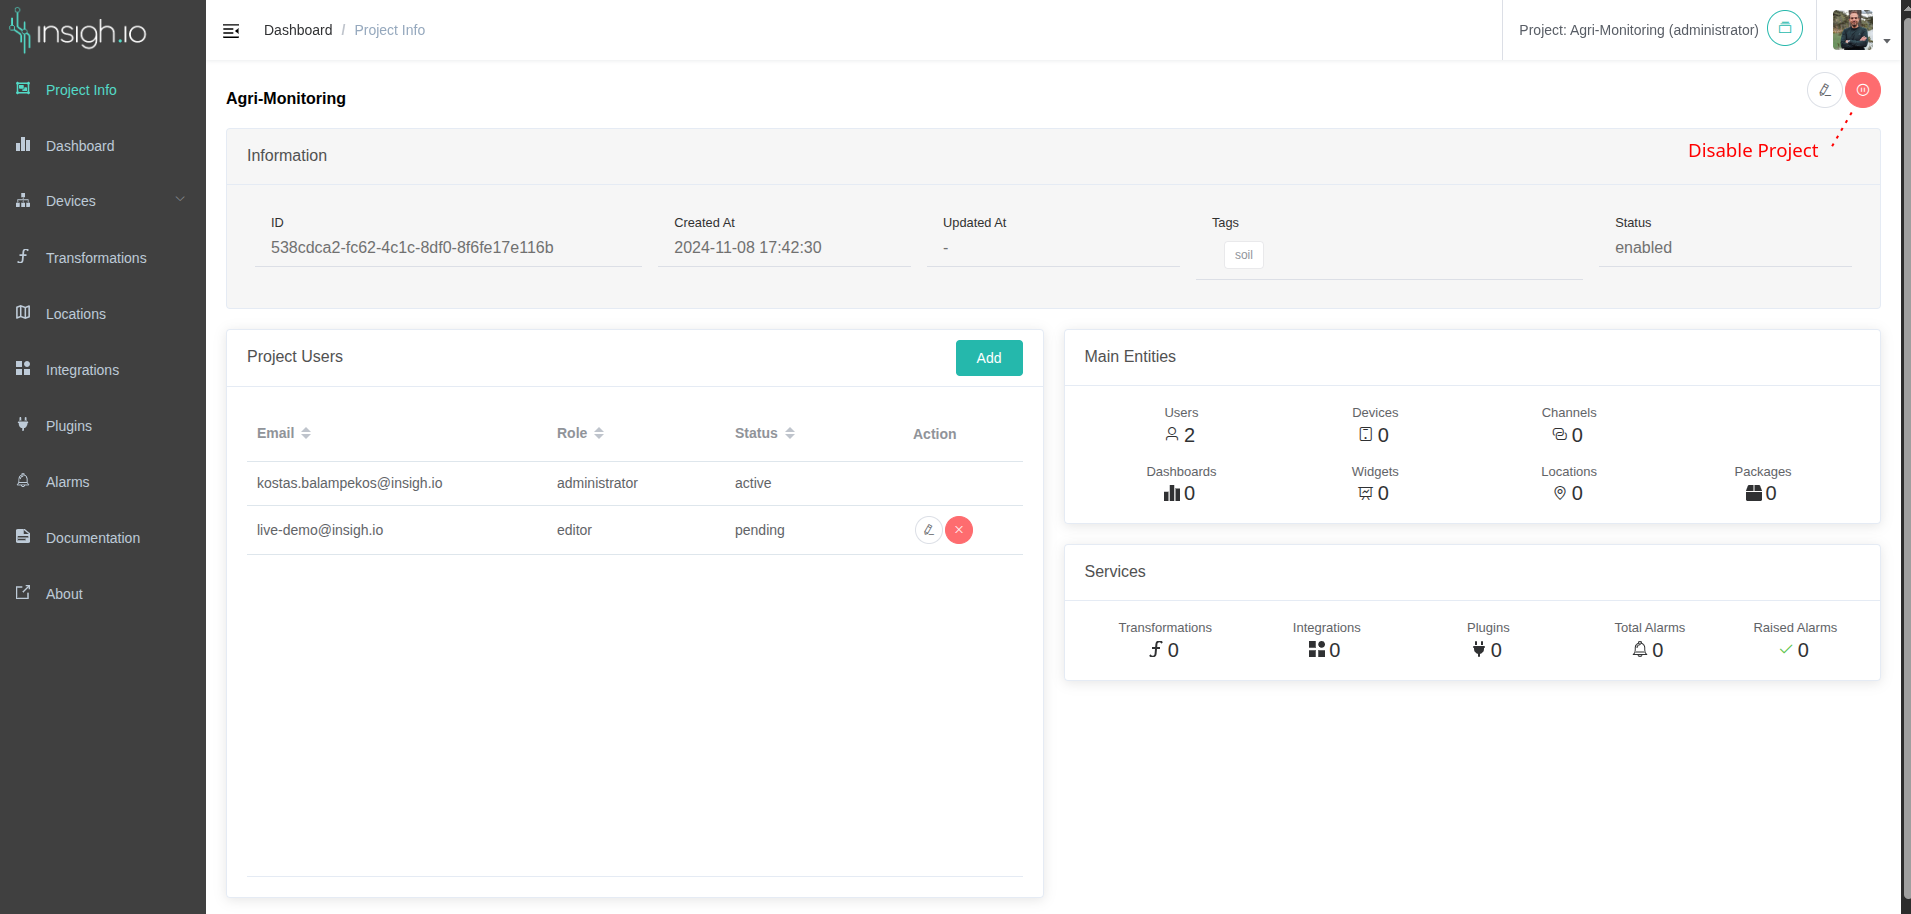
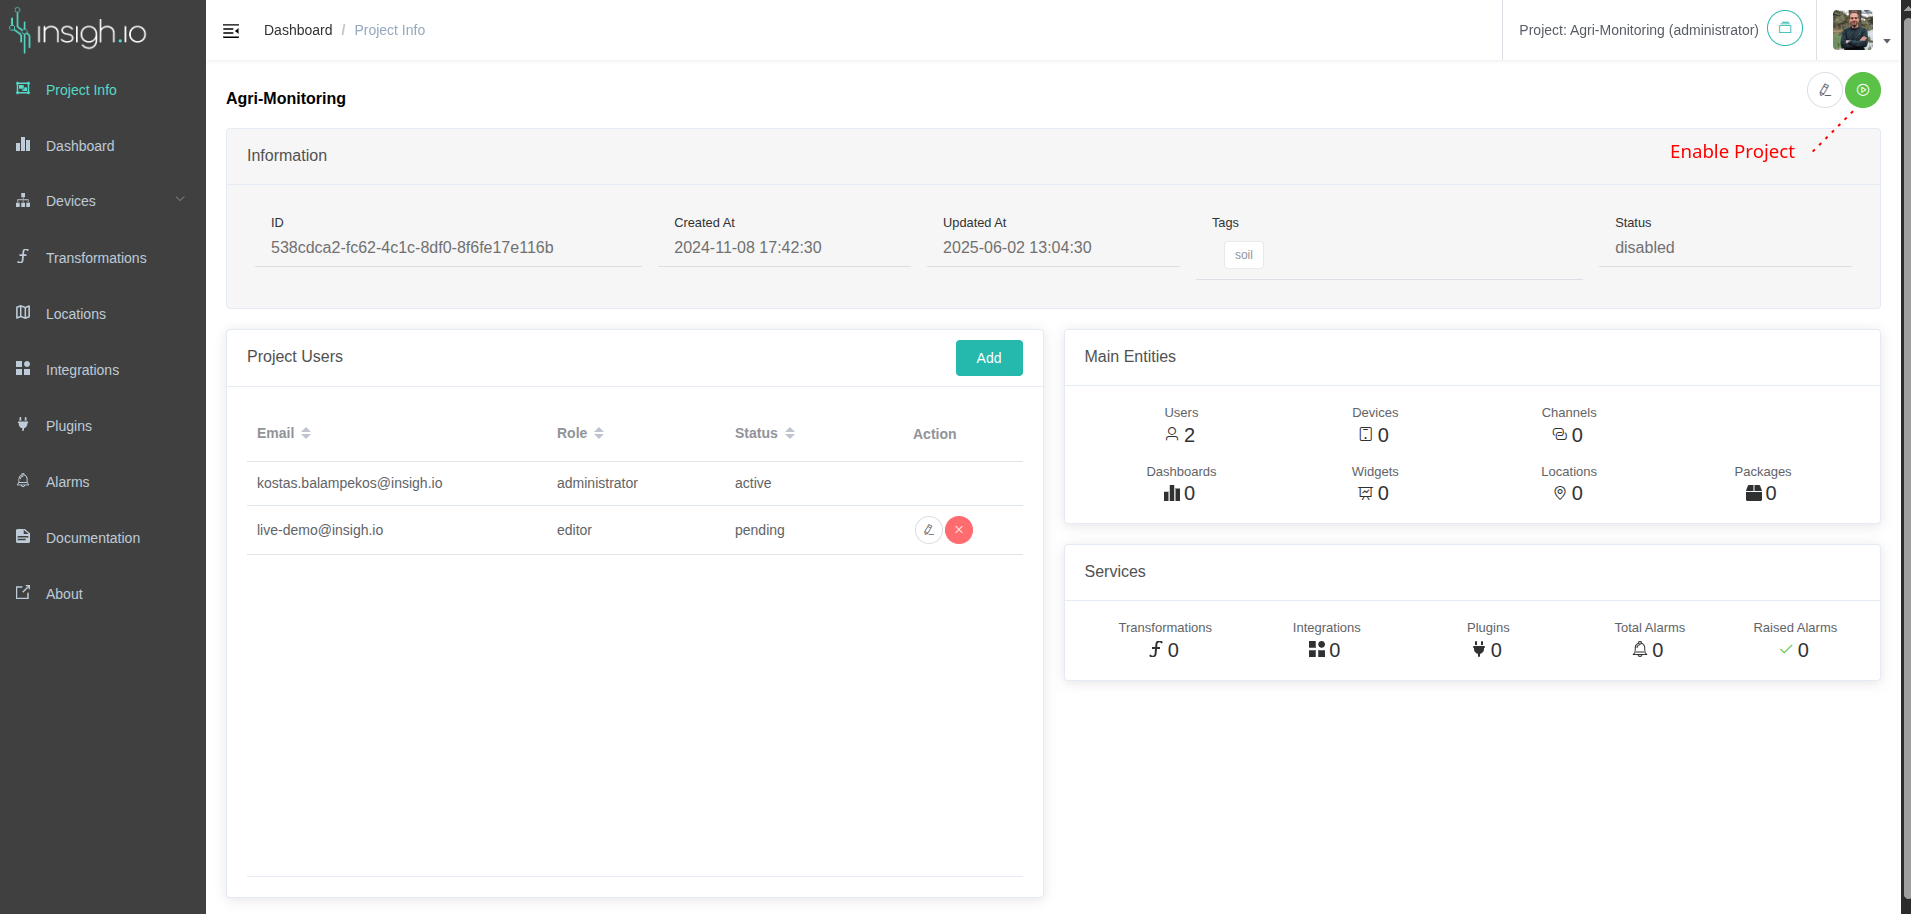
Only project administrators can enable or disable a project.
The disabled projects are shown in the projects list when the respective option is selected:
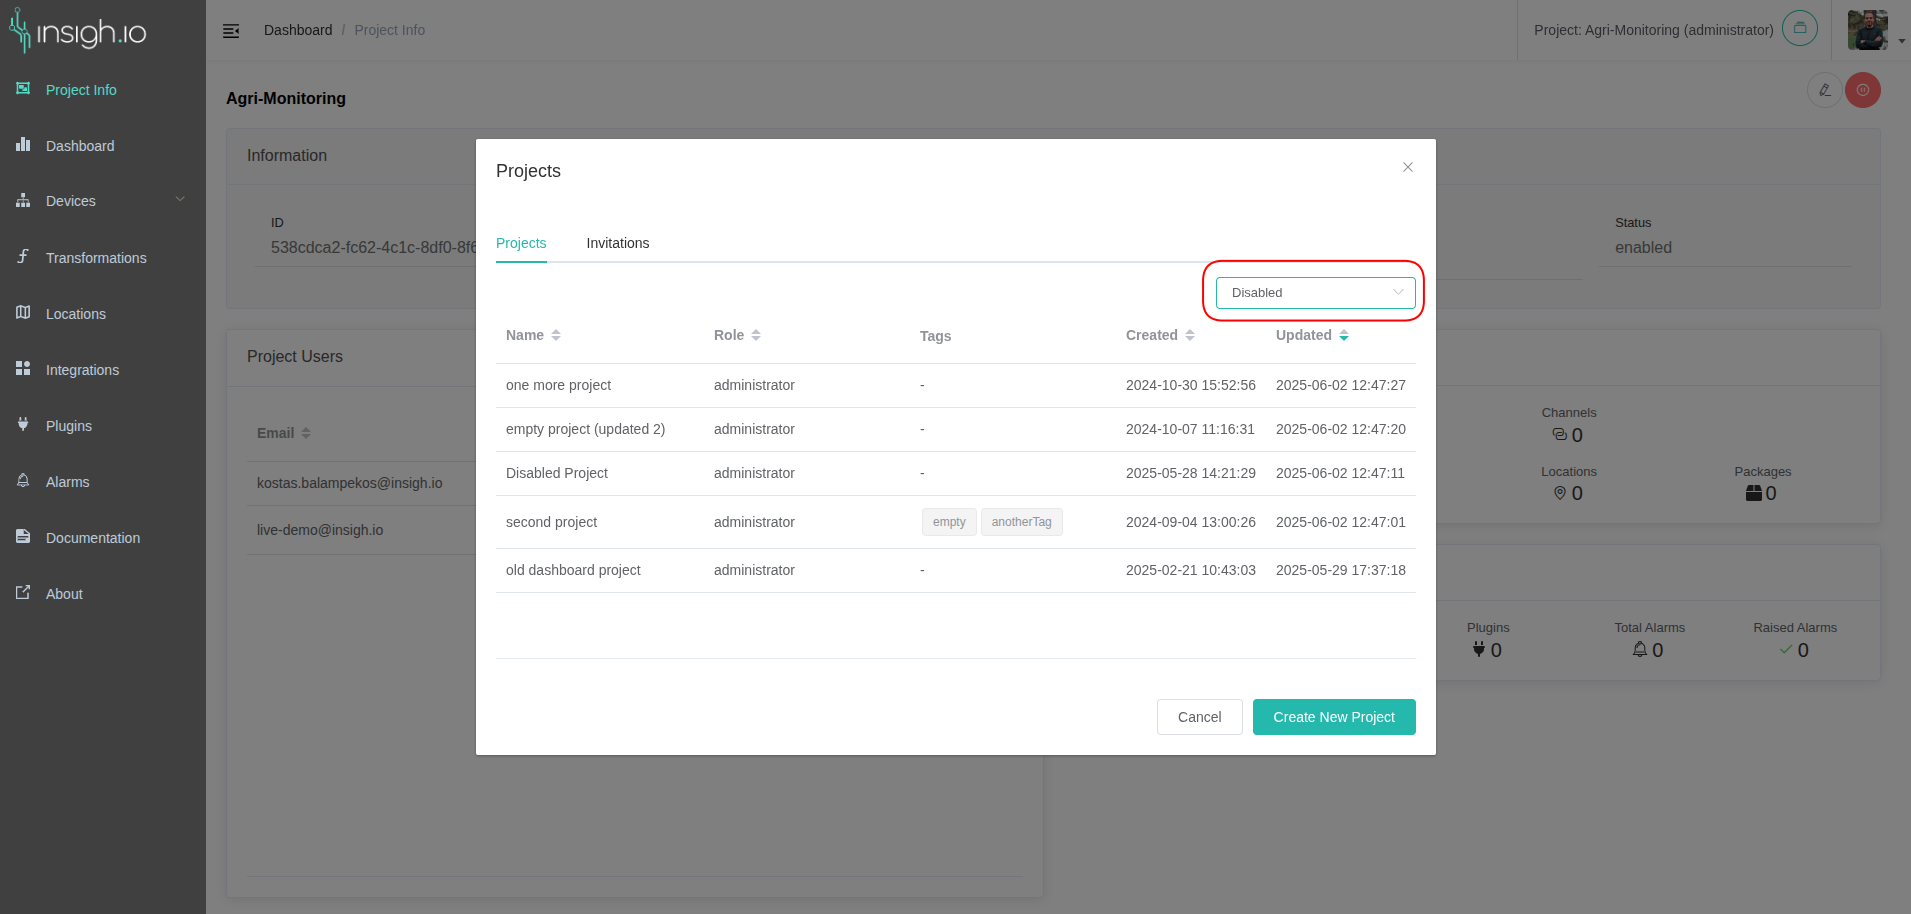
The list only shows disabled projects on which the current user has an administrator role.
Enable a project
Disabled projects can be re-enabled by project administrators. Enabling a project will restore access to editors and viewers. To enable a project, switch to the disabled project, visit the Project Info page and click to the Enable Project button.
