Flashing Guide
In this guide, we provide information on how to flash the firmware in Windows & Linux environments.
Get the files
The first ste is to download the latest release binary. The archive is at compressed form (tar.gz) and can be found under the release assets. The file name format is:
- insighio-<release-version>-<commit-hash>-mpy-<base-micropython-version>-<target-esp32-arch>-<board-version>.tar.gz
- example: insighio-v3.4.6-16134a5-mpy-1.19-esp32s3_8mb_with_data_partition.tar.gz
In each release there are multiple builds in order to support different ESP32 variants. Unless you have a special version of the main board, you should choose the esp32s3_8mb_with_data_partition variant.
There might be releases with no assets at all. These are pre-release versions. We recommend users to work with a version that has built assets.
The next step is to extract the file locally. The archive includes the required binaries and flash scripts for Windows (bat) and Linux (sh).
esptool dependency
The flash scripts uses esptool to download the binaries on the board, so before proceeding make sure esptool is installed.
Option 1: Since esptool is a python project, you should have Python installed in the machine.
- If Python is not installed, download the installer and during installation tick the ADD TO PATH option.
- You might also need to install the pyserial library afterwards using the command
pip install pyserial. - To confirm python is properly installed, run
python --versionin a prompt/shell.
Option 2: Another option is to directly use the executable version of esptool, i.e. esptool.exe.
- Go to Official Project Releases Page which provides the binaries for all platforms and select the Windows version. For example for esptool version 4.10.0 go to this link.
- Copy the exe into the folder you have extracted the firmware.
- Edit the
flash.batfile and replacepython .\esptool.pywith.\esptool.exe.
Install the corresponding python package following this useful tutorial
Pro Tip: The official documentation for esptool is available in this link.
Installation
1. Power Off
If the main board/node is powered on, power it off for ~10 seconds.
2. PC connection
Connect the board board to PC
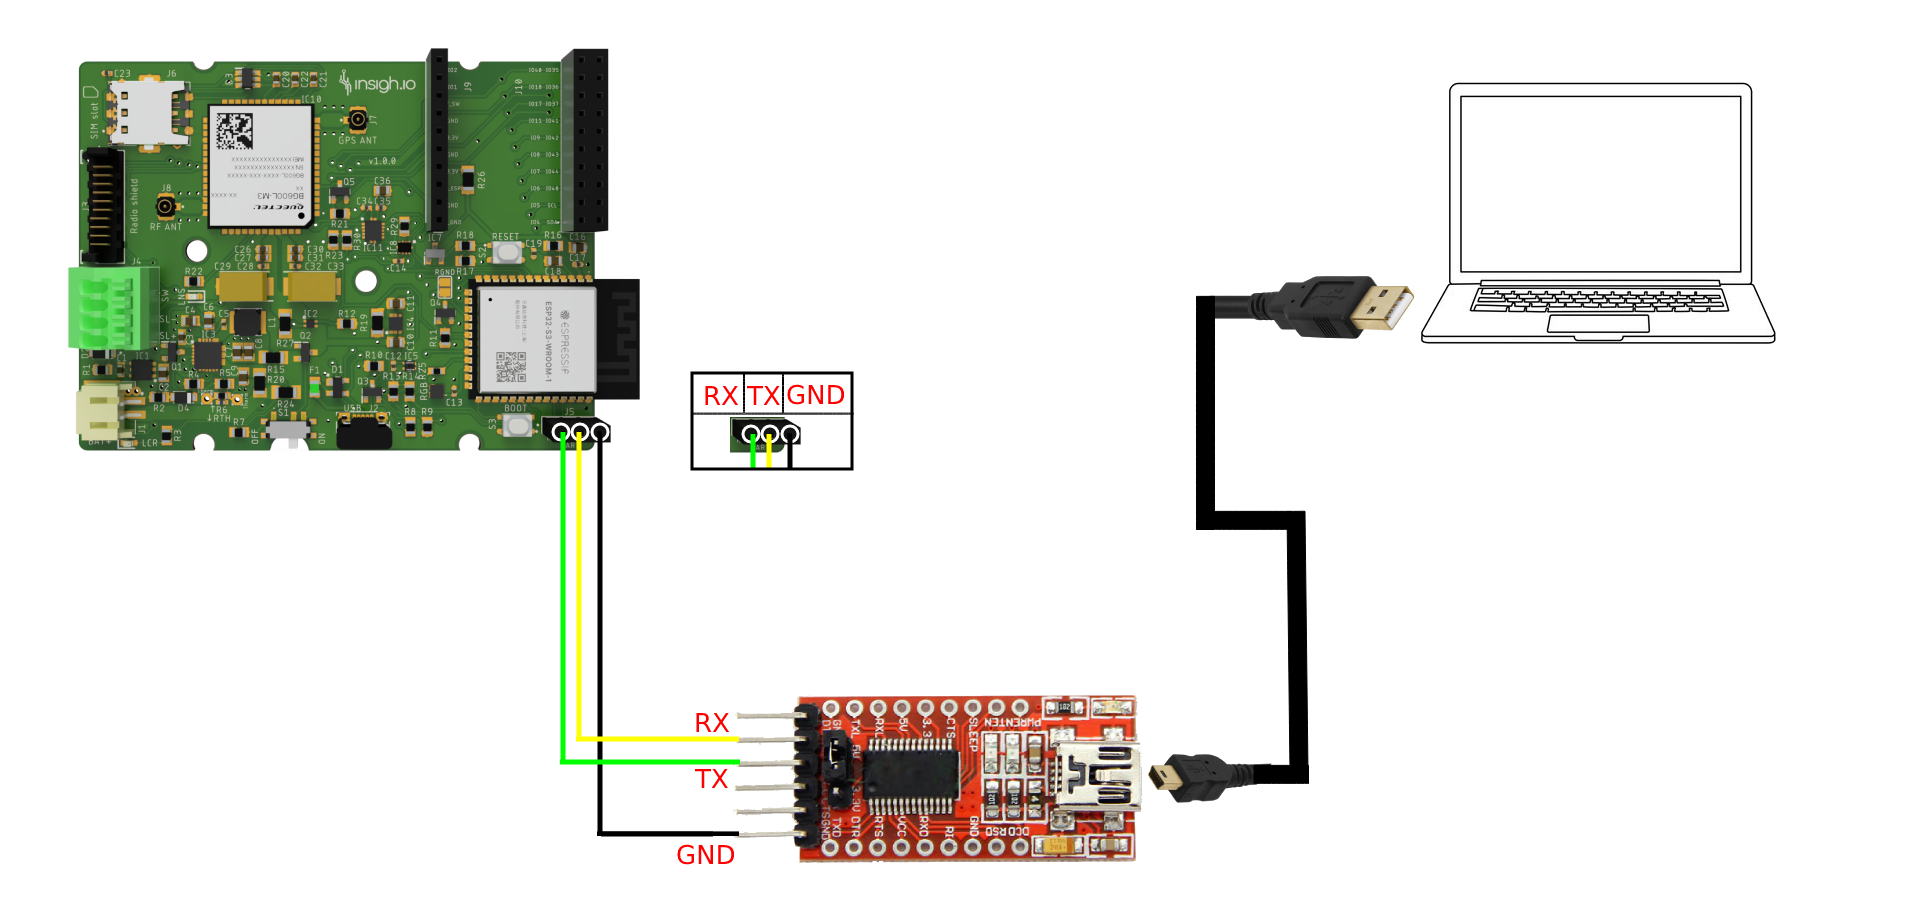
-
via the Board Serial Port using a USB-to-Serial Adapter
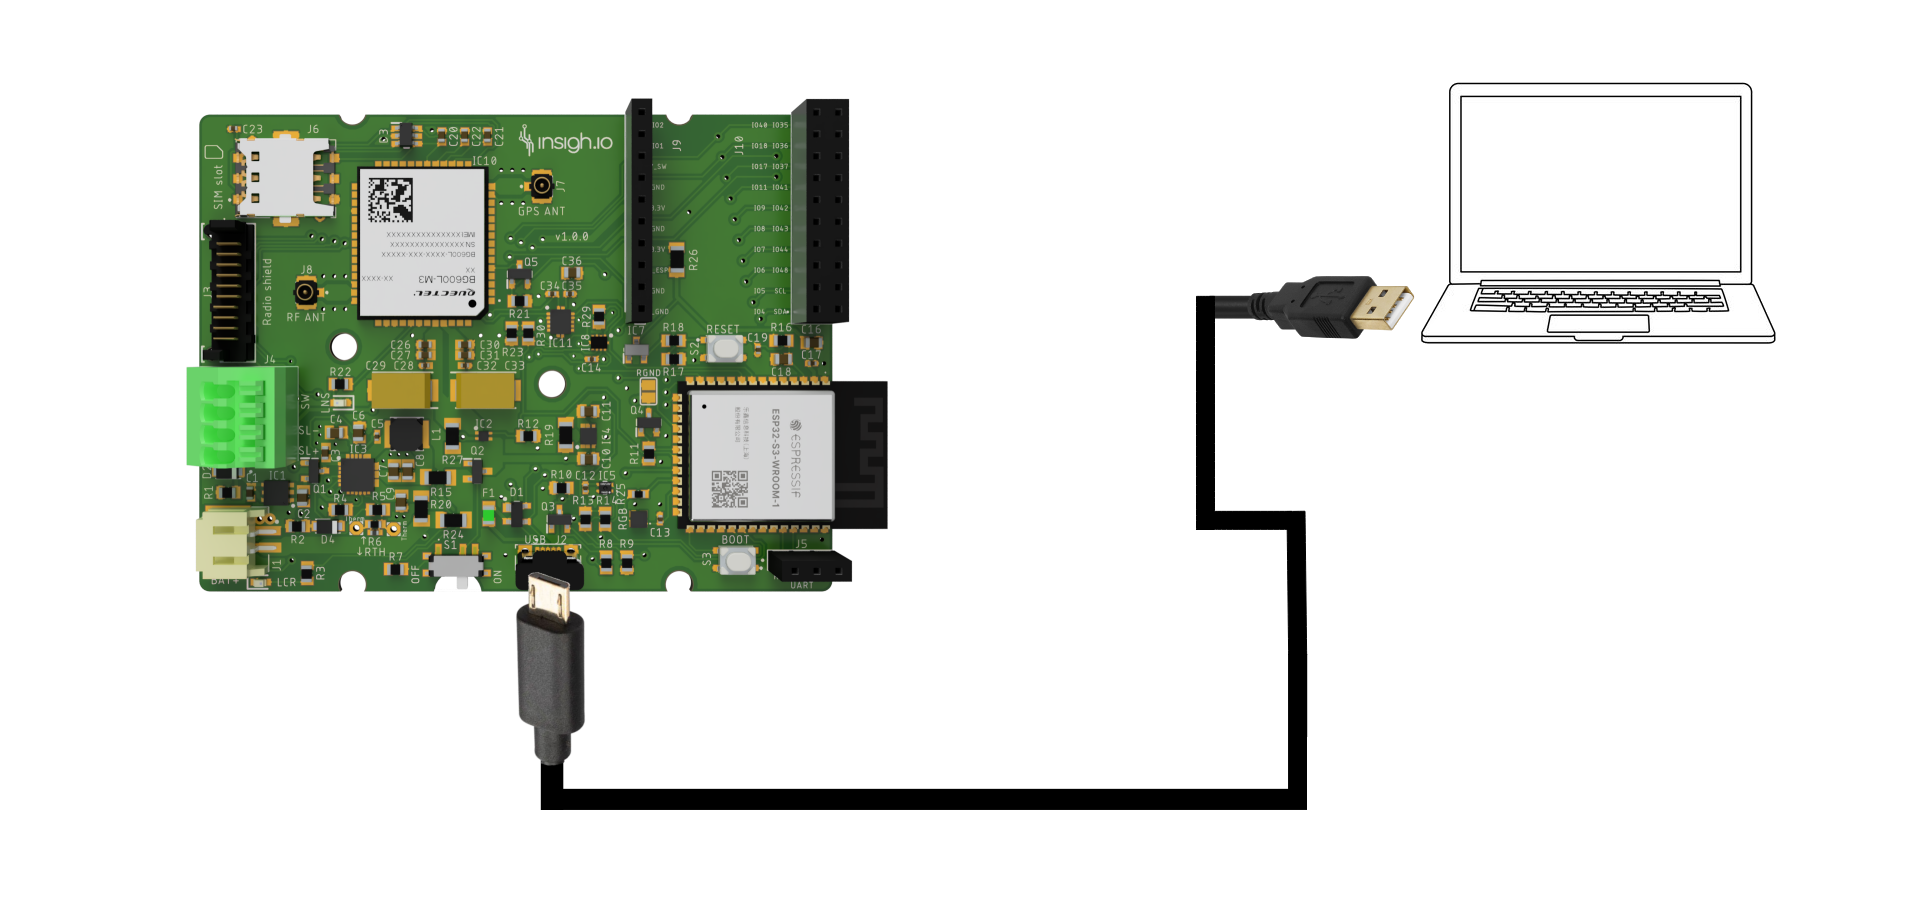
-
via the Board USB Port using a Micro-USB Cable
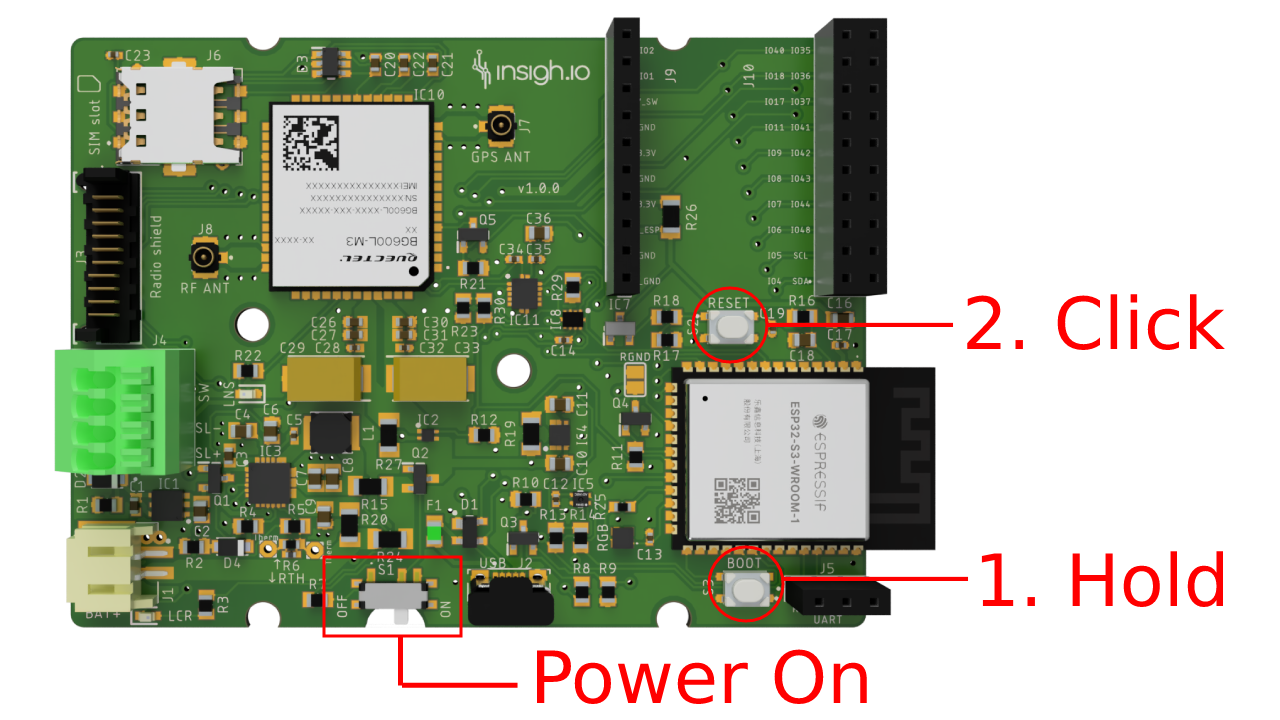
3. Enter Download Mode
- With switch at “off state”: hold “boot” button and then turn switch to “on”
- Alternative method: With switch to “on” state, hold “boot” button and click “reset” button.
In case you have a full node with the external switch, keep the internal switch at “off state” and turn off and on the external switch (with a 5-10 secs internal) while holding the boot button.
To confirm that the device is in the flash (download) mode you can open a Serial Monitor before power on. You can use Putty in Windows or Minicom in Linux, setting baud rate 115200 and the proper Port. After following the previous procedure, you should see in the Monitor the “waiting for download” message. Don’t forget to close the monitor before flashing the binaries or else you will get an error message.
4. Flash
- Find the USB Port from the Device Manager in Windows (e.g.
COM5) - Launch a Command Prompt/Power Shell in the folder where the binary has been extracted.
- Run
flash.batusing as extra argument the specific COM Port as follows:flash.bat <com_port>
After a successful installation you should see an output like this in the prompt:

- Find the USB Port. Typically:
- For USB-to-Serial connection it will be /dev/ttyUSB0
- For direct USB it will be /dev/ttyACM0
- Execute the corresponding flash script included in the archive:
- Option 1 (with port defined explicitly):
bash flash.sh <port> - Option 2 (for standard USB-to-Serial connection):
bash flash_usb0.sh - Option 3 (for direct USB connection):
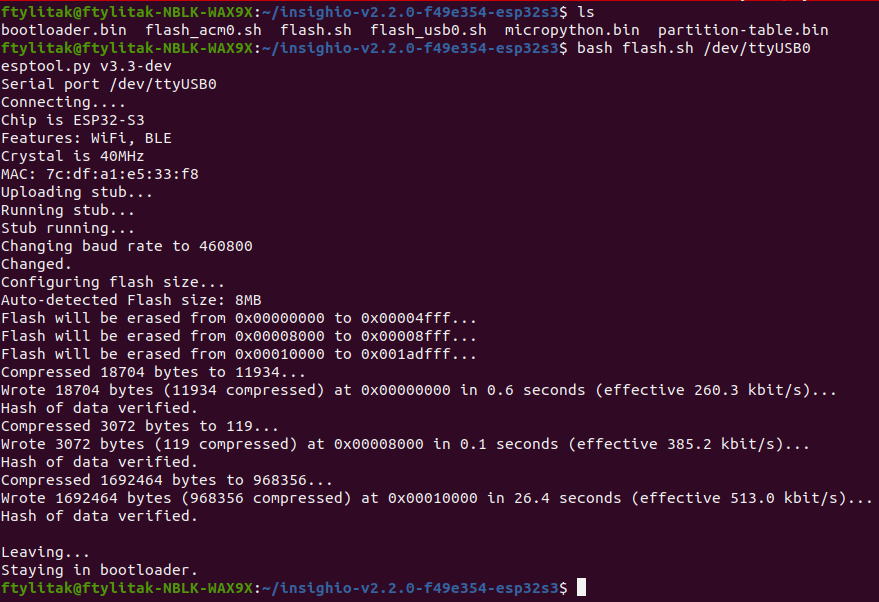
bash flash_acm0.sh
- Option 1 (with port defined explicitly):
After a successful installation you should see an output like this in the prompt:
Note: By default flash.bat (in Windows) and flash.sh (in Linux) make a clean installation, erasing the micro-controller memory before installing the files. If you have flashed another firmware version before and you need to keep the configuration, just edit the flash files with a typical Editor and remove the fist line which forces memory erase.
5. Initialization
- Click the “reset” button once or power off-on the external switch and wait till the initialization finishes. This will take up to a minute, since the setup files are in a special form called “frozen modules” and need to “unfreeze” before usage.
- When the board is ready it will light up the RGB led.
- On first boot, it will directly enter “Configuration mode” and the led will have a blinking magenta color.
- If the device is already configured, it will continue the normal execution circle, with the RGB led becoming solid blue initially.