Configure Node
After completing the platform setup, we are ready to configure and provision the node using the local configurator. In this guide we assume that the node has been already flashed. If not, the user may consult the respective flashing instructions.
For this tutorial we will assume:
- The node is equipped with the Enviro shield as shown in the hardware guide and an 1nce SIM card.
- The following external sensors/devices are attached:
- An SDI-12 sensor (TEROS12 from Meter) configured at address 2
- A Modbus RTU device, with slave address 2, operating at 9600,N,1 and producing dummy values at Holding Register 10.
- A device producing dummy DC voltages in the range 0:2V
The configuration steps include:
- Launch of the configurator & Login
- Select Network
- Enter platform keys
- Configure measurement scenario
- Set measurement and upload data timings
Step-by-step procedure
Launch and access configurator
- Power on the node and you will see its RGB led blinking magenta color. This means that the local web server has been launched and you have 50 seconds to connect to it using WiFi.
- Locate and connect to the local WiFi network which is named as insigh-xxxx with the 4 digits corresponding to the last 4 characters of the MAC address. Use insighiodev as the password.
- After connecting, the RGB led will stop blinking and become solid magenta.
- Launch a Browser and connect to http://192.168.4.1. Use admin and insighiodev for Login.

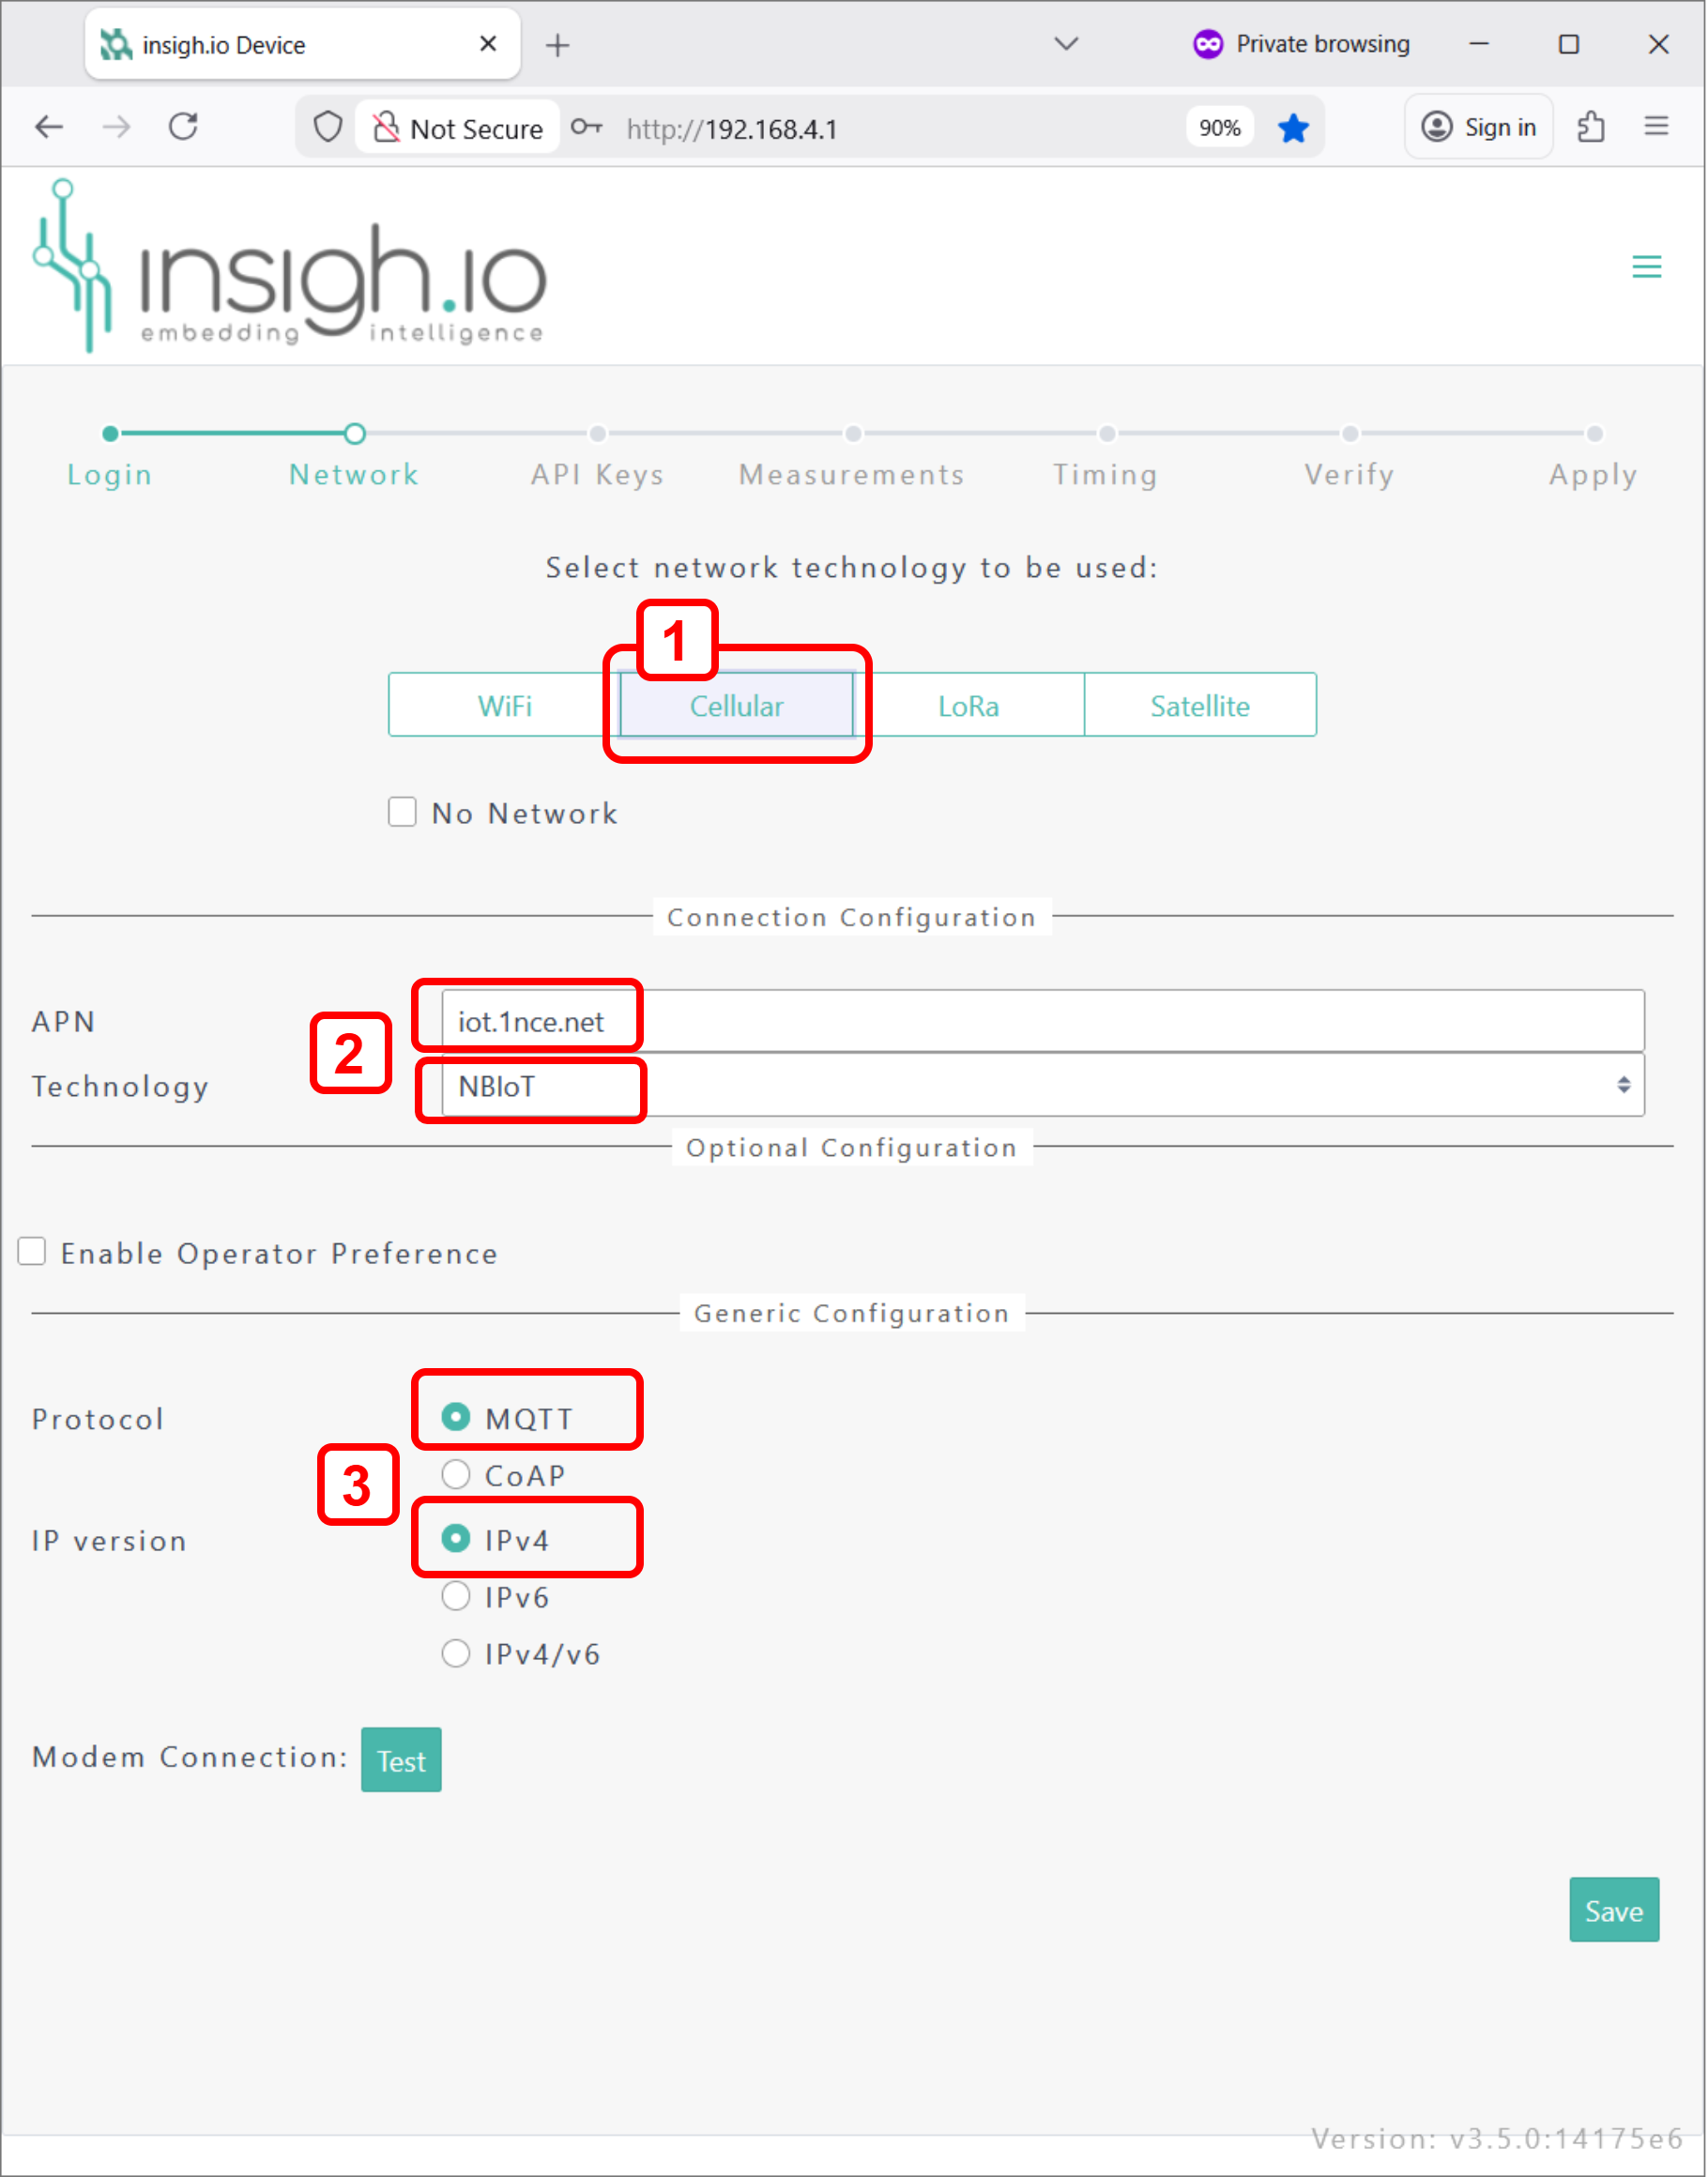
Network Setup
- Select Cellular network option
- Keep default APN (iot.1nce.net) and technology preference (NB-IoT) options.
- For data transport keep MQTT and IPv4 options, which are fully supported over the specific network.
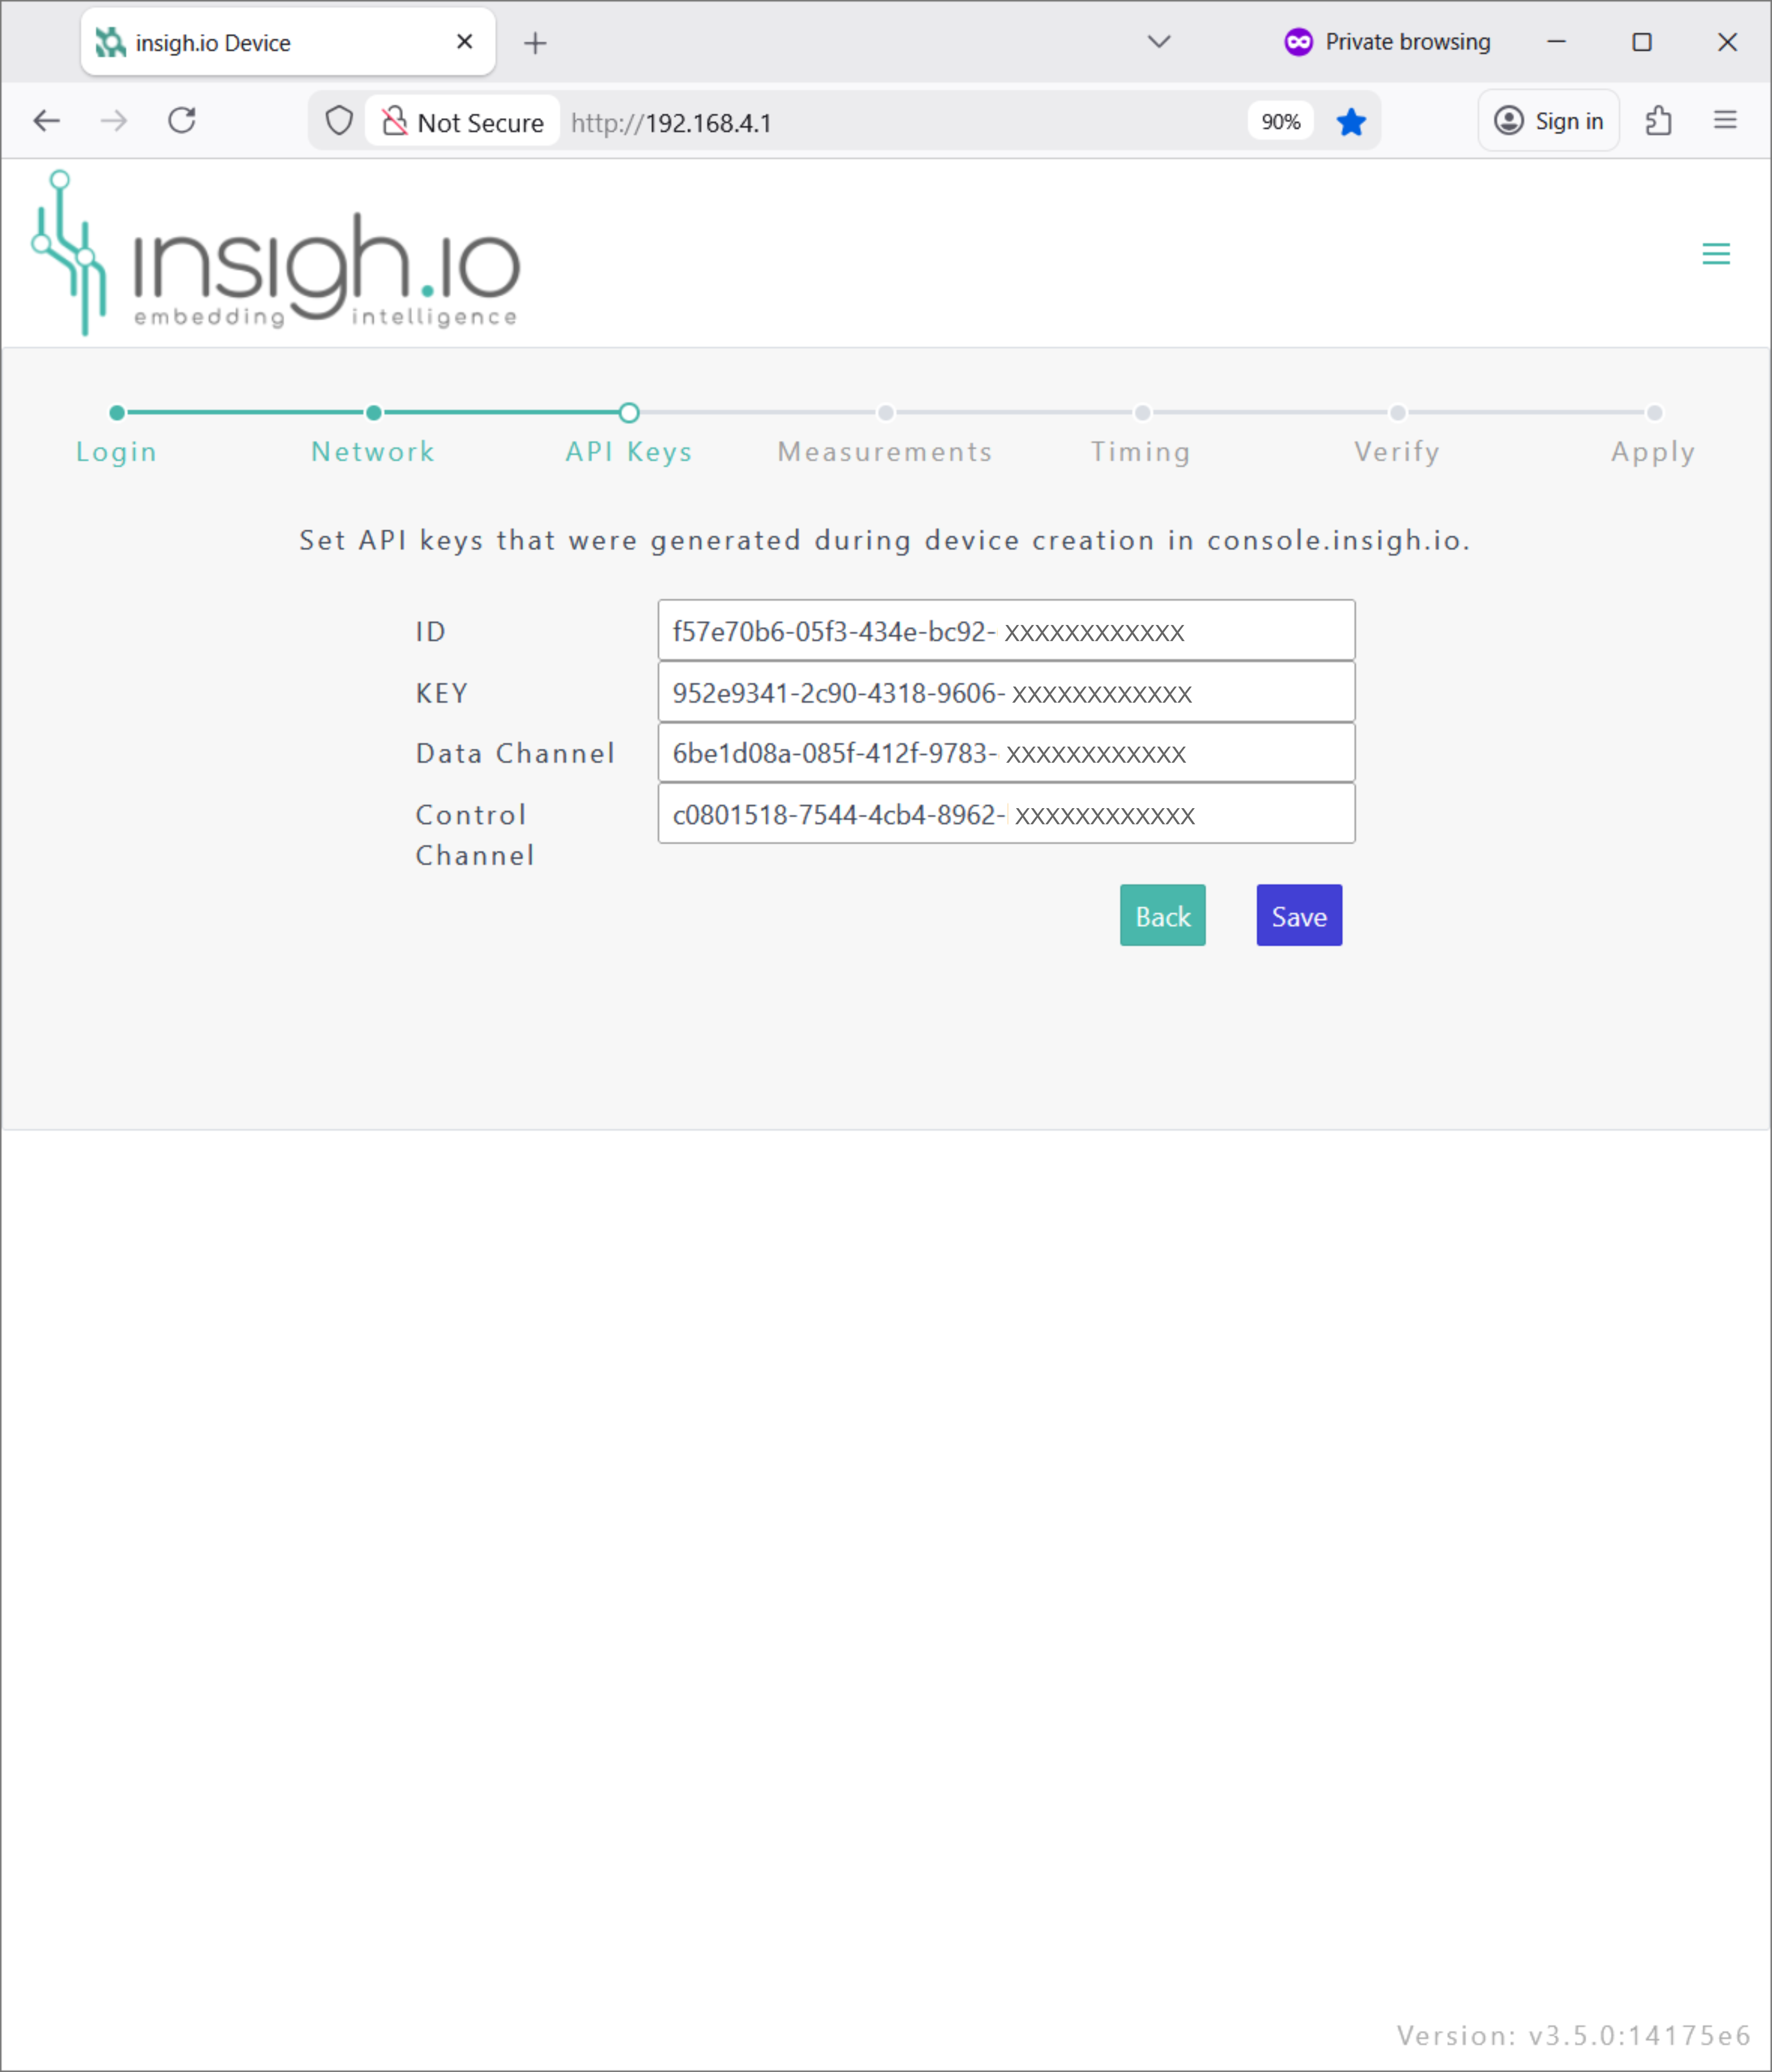
Enter Console Keys
- Locate the JSON holding the keys from the platform setup step and copy it.
- Place the cursor in the ID field and Paste.
- The fields will be automatically populated with the corresponding ID, KEY, Data Channel, and Control Channel information.
From now on the node will be able to authenticate with Console and exchange data and control information.
Measurement Scenario
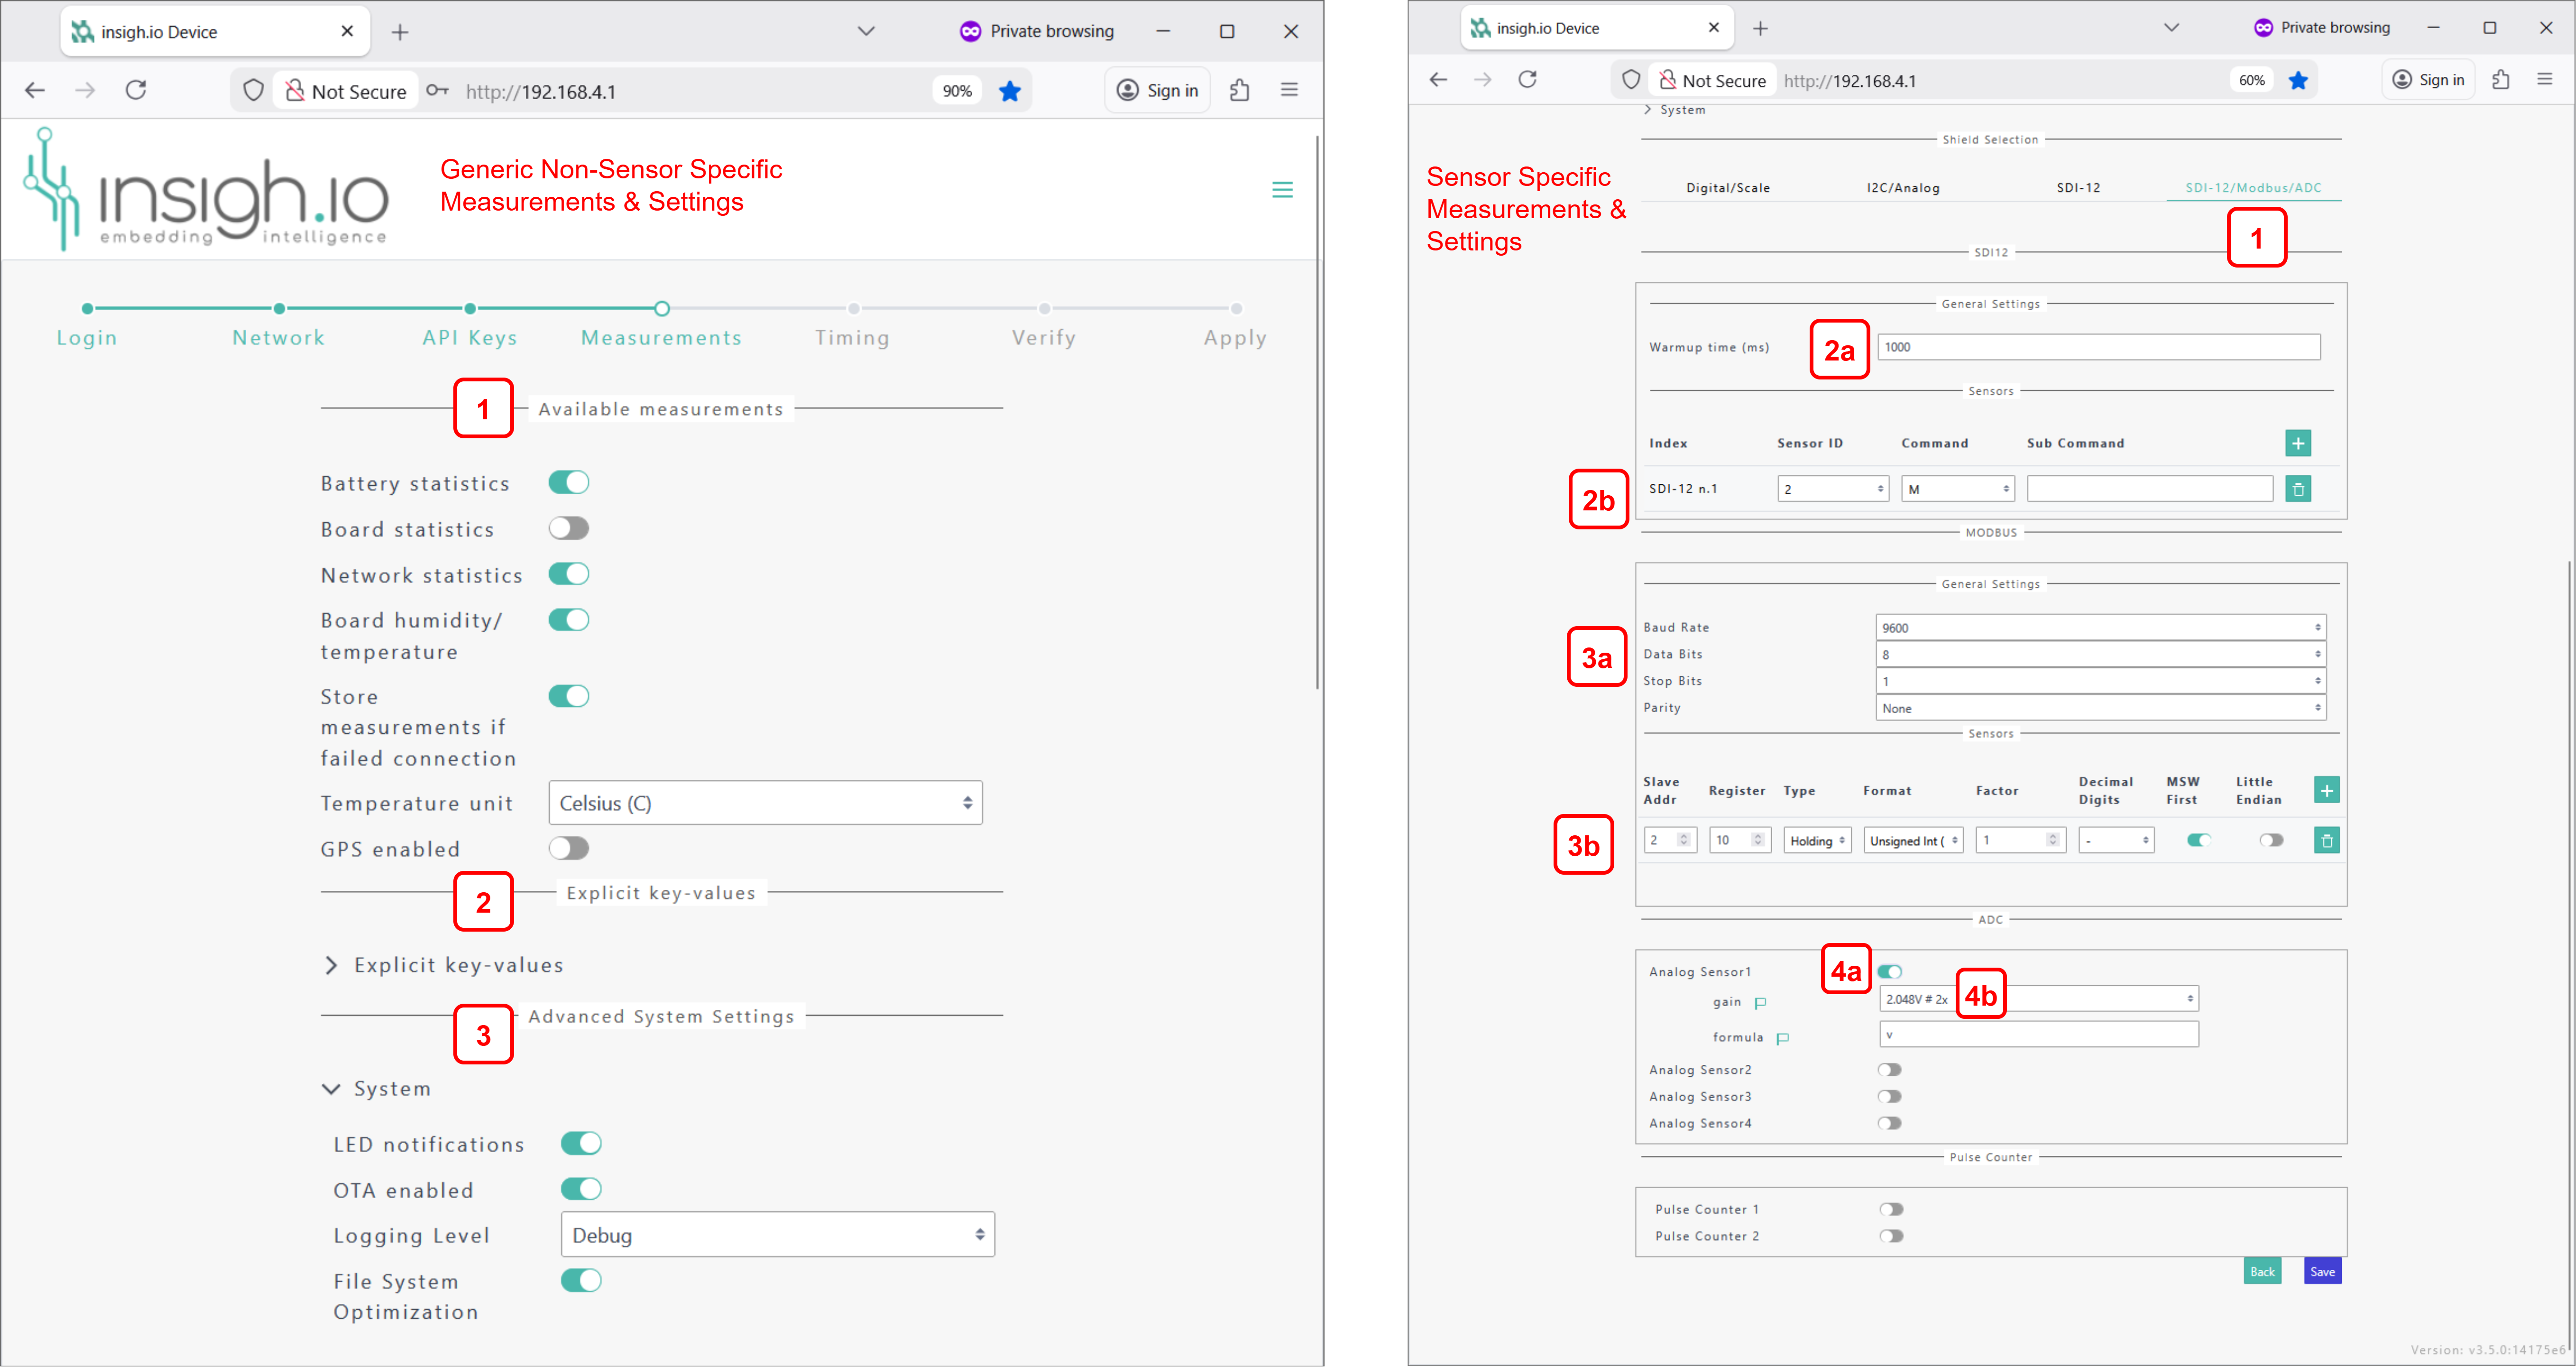
Generic measurements & settings
- Select main board reported measurements
- Battery
- Board (e.g. memory usage)
- Network (e.g. rssi, lac)
- Environmental conditions (temperature, humidity) through embedded sensor
- Location through embedded GPS
- Optionally add static metadata (key-value pairs) to each measurement packet
This feature will be discontinued in future versions
- Setup advanced system settings
- Enable LED notifications
- Enable Over-the-Air Updates
- Enable printout for debugging purposes
- Enable automatic file system optimization (relevant for older firmware versions)
Users are advised to keep default settings (all enabled).
Sensor-specific measurements & settings
- Select Shield:
- For this tutorial we will select the “SDI-12/Modbus/ADC” option in the configurator, as this corresponds to Enviro shield
- Configure SDI-12 interface:
- Define minimum warm-up time for on-demand power supply according to sensor specs
- Add an “M” SDI-12 command for a sensor at address “2” for getting the default TEROS-12 measurement set used in this tutorial.
- Configure Modbus RTU interface:
- Setup baudrate, data bits, stop bits, and parity for the bus
- Add an entry for monitoring the slave-register set for this tutorial.
- Configure Analogue interface:
- Enable Port 1, assuming the analogue device is connected to the specific port.
- Set Gain to 2x for maximum precision, as the max voltage reading is 2V.
Timing
- Set deep sleep period which is actually the measurement period (5 minutes in the tutorial)
- Keep batch upload disabled, so that each measurement is followed by a data upload attempt.

Overview & Apply
Make a final inspection and press Finish to apply the selected settings to the node.

Final Remark
Everything is ready: hardware setup check, configuration check, node onboard in Console check! We can move on to the final validation phase.